Pages

Saturday, December 17, 2016

Growing Livestock at the Fish Farm


Growing Livestock at the Fish Farm 

Four months ago, we took in a pair of goats (doe and buck) and seven hybrid piglets for fattening in the farm. A friend also gifted us a pair of native piglets.


A pair of newly acquired goats (doe at left is black with white patch, buck is all black)

Seven piglets (about 50 days old) which were bought for fattening
A pair of native pigs (initially housed in a crude pen under the lumber shed)


By bringing in these animals, we diversified our farm produce and expanded the use of the fish farm property. That is, grow bangus, tilapia, white prawns in the ponds, and keep farm animals on the earth dikes. We also hoped that this will add to the earnings of my farm workers who'll share in the profits of the livestock project.

My farm overseer and cook take turns tending the fattening pigs. Thrice a day, they clean the pig house, bathe the pigs, and feed them. For feeds, we fed the piglets commercial starters for the first 90 days. Later it's a mix of growers and some other items (such as corn bran, rice bran, wheat bran). To the mix, they add chopped kangkong (swamp cabbage) stems and leaves.


Measuring various hog feed mix items (commercial feeds, corn, rice bran, wheat bran)


Pouring water into the mix
Adding chopped "kangkong" (swamp cabbage) or other greens to the wet mix to produce pig slop

My assistant caretaker tends the goats. Daily, he retrieves the pair from the goat shed and puts them to pasture. The goats graze on weeds and other wild plants on the earth dikes. Late afternoon (or earlier when it rains), the goats are brought back to their shed.

Pig House for Fatteners
 

To house the pigs, we built a small bamboo structure for the fatteners. Around 5 meters by 2 meters, with bamboo posts, roof frame, sidings and gates. On top are GI sheets for the roof. It has concrete floor with concrete feeder and drinker troughs.

Completed bamboo pig house viewed from west

Our main grow-out pond to the north viewed from the pig house

Before we built the house, we had to prepare the earth dike on which to build the base – reinforce it, widen and level it.


Filling the sacks with earth to reinforce, widen and raise the dike where the pig house will be located

Layered sacks of earth piled on top of each other (this method of earth piling will prevent erosion; notice the slope where base is wider)

Layers of earth-filled sacks viewed from up a nearby tree

We bought some drinker nipples but are yet to install them later.

To shield the hogs from rains and wind, we put protective tarp screens. These can be rolled up or down, depending on weather.

Pig Sty for Native Pigs


Native pigs are normally free-ranging. This is good because we won’t need any pig structure – or so we thought. But after letting them out to graze, the pigs quickly ploughed out the earth dikes of our farm. They uprooted everything in their path – plants, weeds, root crops, etc. in search of food. They were tireless earth diggers. Using their snouts, they dug up the ground, loosened up the soil, ate up any soil creatures and other morsels they could find.

Our fish farm doesn’t have wider tracts of land suited to free ranging (say, like a rice field). So we decided to keep our native pigs in confinement instead. Just like their hybrid fattening cousins. Besides, we can’t allow our earth dikes to be eroded. Bad for our fish in the ponds.

Initially we built a pen under our lumber shed, half roofed and the other half open. It has no cement floor. So after awhile, when rains came, the earth floor turned really muddy. Because of their propensity for ploughing out the soil, the native pigs quickly turned the muddied floor into a mess. Result? Their food was stained with mud, drinking water soiled.


A crude enclosure under the lumber shed originally intended for the native pigs

Pair of native pigs seen resting on the earth floor (later became muddy when the rains came)

Finally, we had to put the native pigs in a separate section of our main pig house. It has cement flooring, feed and drinker troughs, so it’s easy to clean. After relocating them, we noticed that the supposed free-ranging pigs, though confined, seemed to like their new “habitat”. They became healthier, gained weight faster. 

A smaller compartment in the main pig house for our 2 native pigs

Goat Shed 


For the goat-raising project, we built a crude goat house made of bamboo. Located in the middle of the earth dikes between our two grow-out ponds. That’s where they stay overnight. In the morning, my goatherd takes the goats to a new grazing area around my farm, tying them up with a long rope. The doe grazes separately from the buck.

Being new in goat raising, I didn’t mind buying my initial stock from just any source - not really mindful of acquiring quality goat stock (such as Boer or Anglo Nubian, the more popular breeds in a tropical country like the Philippines). The idea is to just use any grazing goats, even native ones, to control weed growth in our farm.

It was my assistant caretaker who bought the pair from his neighbor. Turned out the pair of goats that we purchased were not the pure local native goats we expected.

Now that they’re a bit older, we can see that they have some features of a cross-bred goat. They’re bigger, black colored, had more bulk compared to those we see around the farm.

Last week, our doe gave birth to a kid. It came as a big pleasant surprise! My goatherd himself was surprised. He didn’t realize the doe was pregnant although my overseer suspected that it was so. How did it happen?

Well, after asking around, we learned that one of the grazing areas near the main entrance had been visited by a large herd of hybrid goats. One day our goatherd decided to put our goats to pasture in that area and left them there. My other farm workers noticed a large buck (probably a graded Anglo-Nubian, but not a purebred buck) loitering around. This buck stayed alone near our doe for hours.

The rest was history. The visiting buck succeeded in mating with our doe, which got pregnant, without anyone of us noticing.

The female offspring – well, she’s colored light brown, just like the color of the “stray” large buck that sired her.

It was a lucky break for us. Our goat stock (at least the first newly born female kid) got upgraded without our knowledge. Amazing. Can’t ask for more.

What We Feed Our Pigs 


For the first 90 days (age of piglets) or the first 45 days from date of purchase, we fed our piglets with commercial hog feeds (starters).

Thereafter and for the next 5 months, we fed them a combination of the following ingredients (we adopted the feeding tips of our Philippine Department of Agriculture (DA)):

· Commercial feeds (growers or finishers)

· Rice bran (locally called “rubber kono” or “darak”)

· Corn bran (“babang mais”)

· Wheat bran (“trigo”)

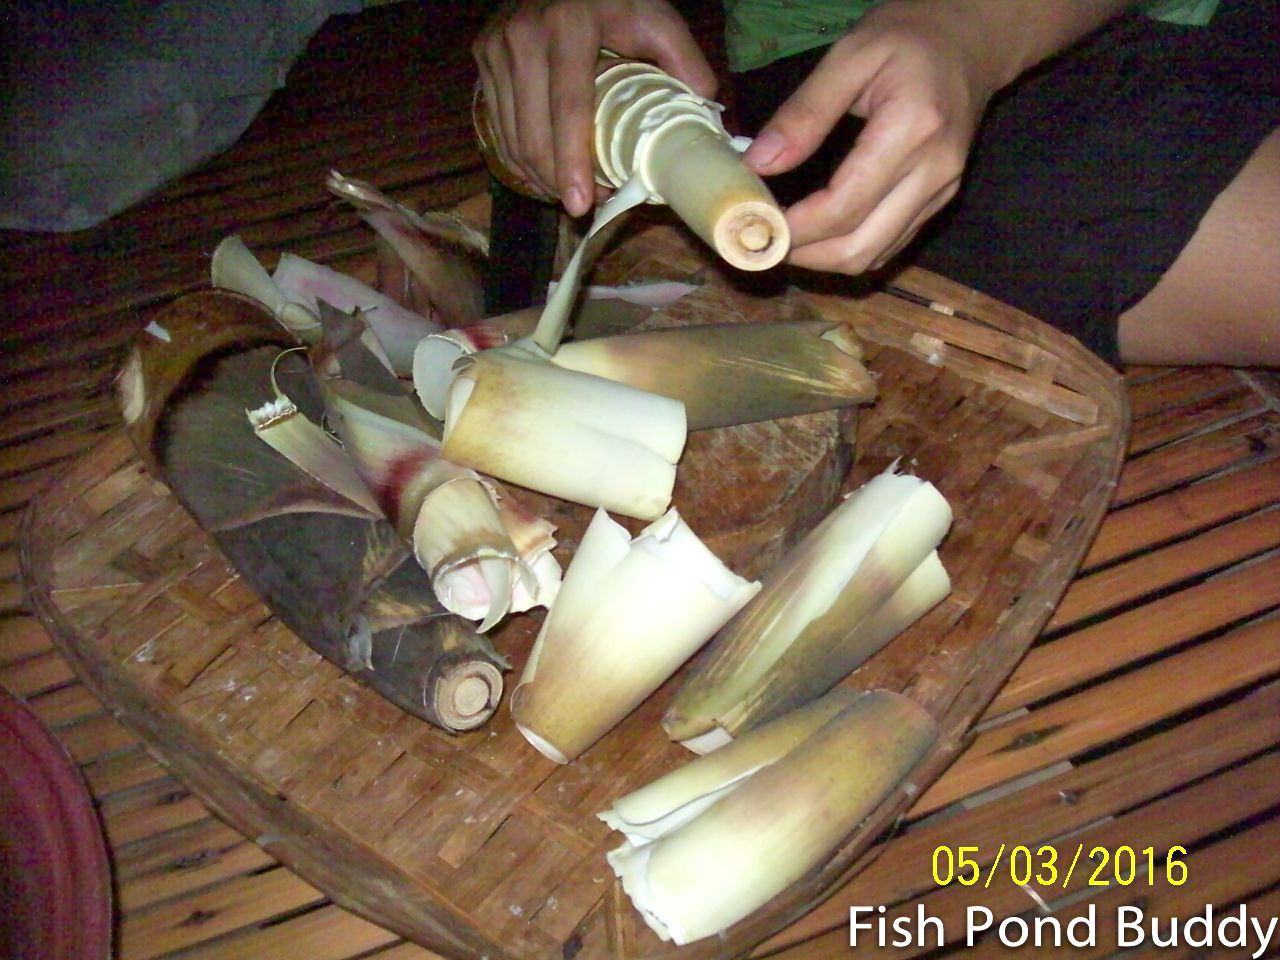
· Swamp cabbage (“kangkong") or

· Banana trunk or

· Vegetable or fruit rejects (disposed at public market)
 

Note: Some other ingredients are included per the DA tip, depending on availability in your farm (such as "ipil-ipil" leaves).

We buy the commercial feeds, rice bran (“darak”), corn bran (“babang
mais”), and wheat bran (“trigo”) at the feed supply shops at the public market. My farm workers gather swamp cabbage (“kangkong”) from around our farm and cut down a trunk from the banana clumps nearby. Sometimes, we get vegetable/fruit rejects for free from our friend-vendors at the public market.

To prepare the feeds: chop or slice the kangkong and banana trunk into small pieces and put in plastic basins. Sprinkle a bit of salt. Then mix all the above feed ingredients in a large plastic pail with some clean water. This type of wet feed (pig slop) is ready to be poured into the feeder trough. Don’t forget to fill the drinker trough with clean water.


My assistant caretaker chopping up the "kangkong" into small pieces (long, uncut stems and leaves are left uneaten).

Before feeding the fatteners (thrice daily), my farm workers make sure the cement floor and troughs are newly cleaned up and washed.


My farm overseer cleaning up the floor with water.
Note: photo shows only two remaining fatteners; others were already sold or slaughtered

Cleaning up the feeding and drinking troughs


Removing dirt and debris from the troughs using broomstick ("walis tingting")


While cleaning the pen, the workers also bathe the pigs to cool them down. Then, they're ready to be fed.

Bathing the pigs thrice a day to cool them down
Cleaned up floor and newly bathed pigs, waiting to be fed

Hybrid fatteners and native pigs at the feeding troughs

How To Monitor and Estimate the Weight of Our Fattening Pigs 

Commercial hog raisers usually weigh their hogs using a metal cage and a heavy duty weighing scale with a hook. The pig enters the cage (with its fixed weight known); the cage hooked up to the scale. The increment (in kilos) represents the pig weight.
 

Most backyard hog growers have no livestock scale for weighing their pigs. They go to a weighing station a few kilometers away to get live weight for a fee.

But it’s always best to have a good estimate of the weight of your fatteners at any time. How? Use the technique applied by backyard hog raisers (available at the internet).

· Measure the length of the pig (in inches) from base of tail to base of ear along the spine.

· Get the diameter of the body (in inches) (called “girth”) using a string or tape measure which is wrapped just behind the forelegs (think of armpit)

· Get the square of the measured diameter or girth in inches

· Multiply by the length in inches

· Divide the result by 400 to the get the estimated weight in pounds

· Divide the weight in pounds by 2.2 to get the weight in kilos

We tried this technique ourselves and compared the above “formula weight” to the actual scale weights for our 3 pigs. Unfortunately, the above “formula or derived” weights are consistently higher by around 7 to 8%. A possible explanation, I presume, is that the above formula is based on Western standards and experience, and applies to US hogs. Most likely, the hog breeds, type of feeds, and method of feeding in the US differ from those in local Philippine conditions.

To adjust this weight to local conditions, we reduced the derived weight further by 8% to get the “adjusted” weight. The result, based on our samples, is very close indeed to actual weight using a scale.

Thus the modified formula that applies to us locally (Philippine conditions) is:

(Length in inches x square of girth in inches) / 400 = weight in pounds / 2.2 = derived weight in kilos x 92% = adjusted weight in kilos

Selling the Fatterners 


For backyard growers, selling is a tricky part of the business. There is no ready market for fattened hogs. After feeding and caring the pigs for 4.5 to 5 months, they are supposed to be ready for disposal.

Live weight can range from 60 to 100 kilos per hog. After 4.5 months of feeding, two of my 7 hogs weighed over 90 kilos, two were in the 80 kilo range, two in the mid 70 range, while one was a laggard and was in the 60 kilo range.

Backyard growers are often at the mercy of pig brokers or private buyers who dictate live weight prices. Also, live weight prices are subject to seasonal fluctuations. Higher when Christmas season nears. Prices remain high first half of year, then drop after that during rainy season.

Brokers sense when backyard growers need to quickly dispose of their hogs. Growers have limited capital and have no financial leverage to negotiate. When hogs reach marketable weight, growers are anxious to sell their livestock to generate cash. Keeping the hogs longer means spending for more feeds and draining the household cash some more. So, it’s the brokers who have the upper hand and can dictate prices.

Increasing Profits from Backyard Piggery 


It’s plain to see that backyard growers who raise fattening hogs and sell all their hogs to brokers after 4 to 6 months hardly make any profit. Because of the low selling price per kilo live weight, sales would be minimal. Cost of major inputs (feeds and piglets), on the other hand, remain high and continue to increase. Resulting profits, thus, suffer.

Given this, it would be foolhardy to take this route, given the length of time, high cost, and amount of effort involved in caring for and feeding the fatteners.

So, what can backyard growers do?

Well, slaughter the pigs and sell meat cuts to end users. This is the only viable option.

In our case, we needed to slaughter one fattener every two weeks, cut them up into meat pieces, and offer them to farm neighbors and friends. For procedures on how to cut up a whole pig, pls. click this.


So far, we slaughtered 2 of our 7 fatteners. Another is scheduled for slaughter in a few days. Earlier, we sold 3 hogs to live weight buyers. The remaining one, we'll keep as our future sow.

The downside in selling pork retail to household consumers is that meat cuts are usually sold on credit – mostly two weeks to pay. Best way to implement this is to make use of canvassers who receive a commission (add-on) for every kilo of pork sold, collected and remitted.


Lastly, an important tip is to keep detailed records of all costs and expenses, sales and receivables. Also the types and quantities of feeds consumed. Without meticulous record-keeping, a backyard grower would have no idea if his piggery project makes money or not.

In addition to our goats and native pigs, we recently introduced native chickens in our fish farm (courtesy of my farm overseer). To learn about our experience with chickens, pls. click this.
 
For a complete list of Fish Pond Buddy blog posts on fish farm-related topics, please click the Index page. 


Sunday, July 10, 2016

How to Prepare Bamboo Shoots ("Labong") for Cooking


How to Prepare Bamboo Shoots (“Labong”) for Cooking

Have you tried eating the young trunk of a tree?

That’s a trick question. But for most rural folks who are familiar with “labong” and “ubod”, the answer is yes.

Our fish farm and neighboring areas are host to a number of coconut and bamboo trees (latter is technically a grass!). A very young bamboo trunk and the topmost inner portion of the coconut tree trunk are actually edible.

Coconut Tree

In one of my previous posts “Uses of Coconut Trees in Our Bangus Farm” (click this), I mentioned the topmost part of the coconut tree trunk where the inner core and growing bud is located. This portion, called palm heart (“ubod” in Tagalog, “apungol" in Pangasinense), is edible and considered a vegetable when harvested.

It’s commonly used as main filling to make “lumpiang ubod” (vegetable egg roll using a crepe-like wrapper).

Bamboo

In this food-related post, I’d like to focus on the bamboo and its edible part.

As we all know, the mature culm (trunk or stem) of the typical bamboo is so tough that it’s commonly used as hardy material for the posts, beams, roof frames, etc. of bamboo houses (click this to see my post on “How to Build a Bamboo Farm Hut”).

A bamboo tree (or grass) has a root system (rhizome) below the ground that we don’t see. But the rhizome continuously produces young culms or stems that sprout upwards. These are commonly referred to as bamboo shoots (“labong” in Tagalog and Pangasinense).

These young shoots are highly sought after by locals (especially rural housewives). In the urban areas, you can buy them at the public market. But in our farm village, they grow naturally in the wild among the bamboo groves. Local folks harvest the shoots and prepare them as ingredients for various native dishes after slicing and boiling.

Here’s how to prepare the bamboo shoots (“labong”) for cooking:

Procedures

1. Get a couple of unpeeled “labong” shoots (shaped like a cone), newly harvested from the bamboo grove. You’ll see green overlapping outer skin layers.


A couple of unpeeled newly harvested bamboo shoots

2. Using a kitchen utility knife or the shorter paring knife, slice off the outer skin layers near the base of the “cone”.


Slicing off outer skin layers near the base of the "labong" cone

3. Peel off (with your hand) the outer layers from the upper portion of the cone. Keep peeling off until you get to the bare whitish flesh.

Peeling off outer layers with hand

4. Slice off with a knife the remaining hard skin portions until the bare whitish flesh is fully exposed. Wash the bamboo shoot cone.


Removing remaining hard skin portions

5. Cut off the hard bottom part.

Removing the hard bottom part

Stripped and cleaned up "labong" cone ready for slicing

6. Cut the cone crosswise into thin round slices.

Cutting crosswise into thin round slices

7. Further cut the round slices into thin strips.

Slicing further into thin strips
Sliced strips from two cones of "labong"


8. Put the thin strips of “labong” in a pot. Pour water to wash out remaining dirt, if any, then drain.

Cut strips transferred to pot

9. Pour water again then cook for around 10 minutes until the "labong" strips are tender.

"Labong" is not eaten fresh but boiled to remove the bitter taste.
 
10. Take out the pot to the basin. Drain out the water using strainer. 


Newly boiled pot of "labong"


Draining out water

11. Put tap water back into the pot, then squeeze out by hand the cooked strips of bamboo shoots.


Squeezing is also meant to remove any lingering bitter taste before cooking.
 
Putting tap water into the pot after draining out hot water

Squeezing out water from the "labong" strips

12. Put the squeezed “labong” in a clean plastic basin.


Squeezed "labong" ready as ingredient

The “labong” strips are now ready as ingredients for cooking various "labong" dishes (see below). They are also used for making pickled "labong" (for basic pickling steps, see my previous blog, Item 2)


In our farm, the “labong” strips are normally used:

· For making "atsarang labong” (pickled bamboo shoots)

· To cook “ginataang labong” with shrimps and/or pork (bamboo shoots in coconut milk)

· Or “ginataang labong with saluyot” (bamboo shoots in coconut milk with jute leaves)

· To make “dinengdeng na labong” (bamboo shoots cooked in fermented fish – usually mixed with “saluyot” (jute leaves) and grilled bangus). "Saluyot" plants grow naturally in our farm during certain months. Or buy them in the public market.

· To saute the strips into “ginisang labong” (sautéed bamboo shoots usually with shrimps).


For a complete list of Fish Pond Buddy blog posts on fish farm-related topics, please click the Index page.
  

Friday, June 24, 2016

How to Buy/Sell Fish Farm Property


How to Buy/Sell Fish Farm Property

Those who wish to engage in bangus farming can either buy or lease fish farm property.

At present, there are no major barriers to entry into the fish farm business in the Philippines, including Pangasinan, except for land ownership. Owning land (including fish ponds) is allowed if the buyer is a Filipino or former natural-born Filipino who is currently a citizen of another country (subject to the limitations prescribed by law).

Under present laws, a foreigner is not allowed to own land in the Philippines, whether residential, agricultural, or commercial, including fish ponds.

There are cases of some foreigners deciding to settle here and marry a local. If the spouse retains her/his Filipino citizenship, the couple can then lawfully buy a fish farm in the name of the Filipino spouse (foreigners are only allowed to buy condos but not land).

Usual ways to acquire property legally are: (a) through purchase or (b) through inheritance, both of which are the subjects of this recent blog post and the next one. I've gone through both cases and here's what I've experienced.

Buying/Selling Fish Farms


In general, the first mode of acquisition – purchase - is more straightforward. Buying a fish pond is similar to buying any other real estate property anywhere else in the Philippines.

For a fish pond, look for a property in a particular location, say Binmaley, Dagupan, or Lingayen in Pangasinan where the bulk of fish farms are located. Decide if you want to own Class A, Class B, or Class C. Fresh water or brackish water. Near the river or slightly inland.
 

Contact the seller, negotiate the price, do an ocular inspection, check for completeness and authenticity of documents, scan the surroundings, check the neighbors, check the source of salt water, check for accessibility of electricity and potable water supply.

Check the property boundaries and concrete monuments, etc (later ask a private surveyor to do a relocation survey prior to contract signing). Make sure the old caretaker will vacate the property, unless you decide to keep him. In other words, do the usual due diligence (operational, financial, and legal) steps to ensure that you’re not buying a lemon.

If everything is OK and you and the seller come to an agreement as to the price and manner of payment, then go to a lawyer for the documents and then pay the agreed price in exchange for the signed deed of absolute sale and other key documents (title, tax declaration, survey plan, copy of latest real estate tax receipts, etc).

Inherited Fish Farms/Real Property

In our town in Binmaley, Pangasinan it’s common to find property (vacant lot, house and lot, agricultural land, or fish ponds) still in the name of parent owners or grandparent-owners (already deceased). The grandparents or parents who were the original owners may have failed to legally transfer their properties to the heirs and may have died intestate (without leaving a will). Some heirs may have already died too and are survived by their children.

As a result, the property is left among the surviving children and the heirs of the deceased children.

But when heirs are not aware of their legal rights, and ownership not clearly defined, this can be a source of problems among various heirs and their children. Problems are magnified if a particular heir or some heirs decide to impose his/their will and take over the property - disregarding the legal rights of other compulsory heirs.

So how should inherited properties be handled? What do you and your siblings do when your parents own a fish farm and both of them have died without transferring their property to the intended heirs.

The above is the subject of my next blog post “How to Transfer Ownership of an Inherited Fish Farm Property to the Heir(s)”. Click this for the detailed steps.

Procedures:

The detailed procedures for Buying/Selling Fish Farm Property are as follows:

1. Do preliminary steps and due diligence procedures to ensure that the fish pond you want to purchase is in accordance with your budget and plan, and meets all the operational and technical requirements of a good bangus farm.

2. Meet with the seller and ask all the relevant questions. It’s best if you as buyer deal directly with the seller (i.e, on a direct buyer or direct seller basis), and not through an agent or a go-between.

 
Ask seller for clarifications, such as:

a. If property is titled or if not, if covered by a Tax Declaration (TD). To make sure the TD is authentic, get a certified true copy of the TD from the municipal assessor. Focus on the name of owner, area covered, the lot number, and adjacent owners. If covered only by TD, inquire into how the property was acquired (perhaps through a previous sale or inherited). Ask for copy of relevant documents. Check details with the municipal assessor to make sure the property being sold by the seller is the same one in the TD and survey plan, if any.


b. If the annual real estate taxes are being paid and who pays them; ask for copy of tax receipts for at least last two years.

c. If property is in the name of the seller you are dealing with.

d. Confirm the identity of the seller. Ask for government-issued identification such as driver’s license, passport, Philhealth, SSS, Voter’s ID, etc.

e. If title is clean, i.e. no encumbrances (such as a mortgage) as annotated at the back of the title.

f. If the title held by the owner (owner’s copy) is the same one kept by the Register of Deeds (RD copy). Request for a certified true copy of the title from the Register of Deeds (all pages).

g. If owner is abroad and you’re dealing with his representative, ask if the latter has a special power of attorney (SPA) to legally represent the owner. If possible,communicate with the owner through email or Viber so that the owner can confirm the SPA.

Normally it’s best to deal with the seller directly. But if you personally know his representative (say he’s a resident in your village) and you know he’s acting for the seller (because he’s a trusted relative or caretaker), ask him for an SPA so he can formally deal with you as an attorney in-fact for the seller.

Never deal with a “representative” without an SPA. An SPA from abroad (such as US or Canada) is notarized at the Philippine consular office and has a “red ribbon”. This means the SPA has undergone either consular notarization (person appeared personally at the consulate) or consular authentication (notarized by a local county clerk and submitted to the consular office for authentication).

h. If seller is married and he will sign the contract as seller with the written consent of his spouse. It’s possible spousal or marital consent will not be given or is faked (you may have future problems later).


i. If the property being purchased/sold is the subject of a pending case before the courts. Obtain a certification from the Municipal Trial Court and Regional Trial Court concerned where the property is located.


3. Negotiate the final price. This is usually the selling price per hectare or per square meter.

4. Agree on the manner of payment.

Normally the seller would prefer full payment in cash or manager’s check. Sometimes, the seller would agree on a down payment with the balance payable every quarter over a one-year period, or some other arrangements.

5. Agree on who will pay the various taxes and fees.

The usual practice is for the seller to assume payment of the 6% capital gains tax to the Bureau of Internal Revenue (BIR). The buyer in turn shoulders payment of the 1.5% documentary stamp tax to the BIR, 0.5% or 0.75% transfer tax to the Provincial/City Treasurer (depends on whether province or city), and 0.25% registration fee to the Register of Deeds. Taxes to BIR are computed based on actual selling price or zonal value, whichever is higher.

However, depending on the negotiations and if the buyer agrees, the seller may demand a certain compensation for the property without any deductions (usually referred by locals as “malinis” in Tagalog (clean)). That is, the buyer will pay for all taxes and fees.

This is usually the case when the owner is selling at a price below market, or on a rush basis, and the buyer feels he has gotten away with a good deal even with all the add-ons (taxes and fees).


A word of caution regarding taxes. Both seller and buyer must be aware of the zonal valuation presently assigned on fishponds in the Philippines. For one reason or another, Philippine tax authorities, in their latest release of zonal values (as of 2017), have assigned an unusually high zonal value on fishponds, as against other property categories. In other words, the zonal value per square meter of fishponds in Pangasinan is much higher than the prevailing market selling price. 

For example, in Binmaley the zonal value assigned is P173/sq.m for Canaoalan and P155/sq.m for Caloocan Norte for non Class A fishponds in the interior areas. Current selling price for same is about P90,100, or 105.

This results in a dilemma for the seller. Should he sell at a price higher than zonal value to cover taxes and find out later that he can hardly find a buyer. Or should he price it much lower and negotiate for the buyer to shoulder all expenses, including taxes. "Why should I sell at P90 to 100 when I'll be taxed at P173/sq.m." is a question that nags a fishpond property owner.

6. Agree on who will shoulder the cost of a relocation survey.

Normally, during ocular inspection the seller usually accompanies the buyer in touring the property, pointing out the various boundaries and even concrete monuments, if they are still there.

However, the buyer may decide to hire his own private surveyor to do a relocation survey and establish the boundaries of the property. The bearings are indicated in the technical description stated in the title. Sometimes, the property already has an old survey plan where the boundaries, bearings, and distances (in meters) from point to point are listed under the technical description.

During the survey, part of the services of the surveyor is to reinstall the concrete monuments, in case some of these are missing. That way the new owner will be reassured of the correct boundaries of the fish farm property he is buying.

When conducting a relocation survey, it’s best to inform the owners or representatives of the adjoining properties, so that they will be present during the survey.

7. Check access to the property, both by pedestrians or vehicles if this is possible.

Sometimes the property is way off the road and owner would need to traverse an intervening property. Check if there is unhindered access to the farm property being bought.

Is there a need to formally secure right of way? Is there a possibility that the property may be blocked off?

Normally access of people is through the earth dikes connecting all the fish ponds in the vicinity. The main earth dikes are sometimes wide enough to allow entry of motorcycles and even tricycles. Check if the main access dikes are traversed by residents in the vicinity.

8. Check how pond water is accessed.

How does water enter the ponds to make it brackish? For Class A, this would be obvious as it should be beside the river.

For Class B, water will come from an adjacent Class A pond. Get assurance that entry of water will not be blocked under the new owners.

For Class C ponds, check the canal system through which existing river water is being channeled to the farm property. Usually the Class C ponds, together with other adjacent ponds, spend annually for canal digging expenses in order to let water in before the start of the rainy season. Get assurance from seller that the same system will be followed for the new owner.

9. Check the status of the present caretaker, if any. Get assurance that the property is vacated of any caretaker upon signing of the contract, unless the caretaker is endorsed by the seller and retained by the buyer.

There are cases when a demanding caretaker is able to impose his will on the owner and claims that he can’t be ejected even if the property is sold to a new owner.

Under Philippine laws, fish ponds are not considered agricultural lands (like a rice farm). As such the fish pond caretaker does not enjoy a security of tenure which a rice farm tenant enjoys. In the case of an agricultural lease, the tenant can’t be ejected even if the property is sold, unless he violates the terms of the lease agreement.

In the case of fish farm caretaker, the old owner goes, the tenure of the caretaker ends too.

It’s possible that the old caretaker may be endorsed by the old owner to the new owner especially if the caretaker has a good record. In which case, the old caretaker stays.

Else, the buyer must get assurance that the property will be vacated of the caretaker if the new owner decides to employ his own farm workers and caretaker.


Final note: it's possible that the old caretaker may have been allowed by the old owner to buy a small area of the lot where his hut stands or a small area at the corner. Possible if the old caretaker had a good record. Thus, he will remain within his small parcel of lot regardless of who the new fish pond owner is.

10. Check if the total selling price for the lot includes add-ons, say, existing farm hut, water supply, electricity supply including service line posts and wires, hand water pump, etc.

The old owner may decide to sell everything on the property, including farm structures (such as bamboo farm hut), metered water facilities, electricity-related assets (wires, posts), hand water pump that he may decide to leave behind. Negotiate for the valuation of these assets and agree on the specific value of the add-ons.

11. If all the above items have been resolved by both parties and no pending items remain, and both buyer and seller agree on all terms and conditions, hire a lawyer to draft the sale documents.

As mentioned, this will either be the Contract To Sell (if payment is not in full, say, down payment only with balance payable in a year) or a Deed of Absolute Sale (DAS) (if payment is in full in the form of cash or manager’s/cashier’s check). 


Under a sale on installment, where the transaction is covered by a Contract to Sell, a DAS will still be prepared but only after full payment has been completed by the buyer.

12. Before accepting the manager’s check or cashier’s check, validate the check with the issuing bank for authenticity.

13. Prepare an Acknowledgment Receipt (AR) and have it ready for the contract signing.

Note that the Bureau of Internal Revenue (BIR) requires presentation of the AR signed and dated by the seller as evidence that he has in fact received the contract price stated in the DAS.

14. When the DAS is ready for signing, choose a safe and secure venue where exchange of payment and signing of DAS can take place.

Normally, this is either inside a bank or in a notary public’s office. Most buyers and sellers choose to close the deal in a bank. Reasons are:

· bank premises are generally safe and secure

· only the signing parties are present perhaps accompanied by spouses and/or designated witnesses (more discreet)

· counting of money, in case of cash payment, can be done with the help of the bank teller/counting machines. That way, both the buyer and seller can rely on the teller’s cash count.

· If bank chosen is the seller’s bank, seller can immediately deposit the cash received from the buyer in his bank account. This immediately puts the cash under bank custody. This is also a security measure for the seller since he no longer has to carry large amounts of cash in his possession.

· If the bank chosen is the buyer’s, he can withdraw the required cash from the bank. No need to carry cash in his possession during contract signing.


· If the bank chosen is both the buyer’s and seller's, then payment will just be a bank transfer from one account to another Only a withdrawal slip and a corresponding bank deposit slip will be prepared. No need to handle or count cash during such transaction.

15. As buyer, pay the seller the agreed purchase price per contract. Upon receipt of cash, seller and buyer sign on the DAS.

As mentioned, payment may take the form of:

· Cash. Seller asks the bank teller to count the cash. When the amount counted is correct, then both buyer and seller signs the DAS. Upon signing, the seller either takes the cash or deposits it in his account.

· Manager’s check or cashier's check which has been previously validated by the buyer. Upon presentation of the check, both seller signs on the DAS (Note: marital consent of spouse can be obtained beforehand, in case spouse of seller will not be present during signing. For authentication, just submit a photocopy of her IDs, with original signature at the side).

16. After payment of the contract price and signing of DAS, ask the seller to sign the Acknowledgment Receipt (AR). Date to be indicated should be the same as notarization date (see below).

17. Have the signed DAS notarized by a licensed notary public.

Some notaries public won’t notarize the document unless all signing parties are present and sign the document in his presence. Others, especially those who you deal with regularly, may allow pre-signing as long as you show two government IDs with your signature on them. For authentication, he will request you to submit a photocopy of the said IDs with the original signature at the side. This is his assurance that the signatories in the notarized documents are indeed the parties named in the contract.

The lawyer-notary public seals and signs the document and stamps the date of notarization. He also indicates at the last page of the document pertinent details (document number, page number, book number, year series) as recorded in his notarial register.


When signing in the presence of a Notary Public, both seller and buyer are required to sign in the notarial record book.

Take note of the date of notarization which is very important (relevant when setting tax deadlines and avoiding penalties, see Step 22).

18. Go the Bureau of Internal Revenue (BIR) Revenue District where the property is located (in our case Alaminos, Pangasinan for properties sold in our area) and apply for payment of the capital gains tax (CGT). Do the following steps:

a. Fill out BIR Form 1706 in triplicate.

b. Make sure you have the following required documents with you. These basic requirements are what appears in the BIR website:

· One original and one photocopy of the DAS (get from the seller)

· Certified true copy of the TCT (request from the Register of Deeds)

· Certified true copy of the latest TD (apply at the Municipal Assessor)


· Certificate of No Improvement (apply at the Municipal Assessor)
   
c. Bring with you the original copy of AR and one photocopy. Although not mentioned in the BIR website, the AR is usually required during tax assessment to determine the date when the 30 days period required to pay the capital gains tax will start.

d. Also request a vicinity map from the Municipal Assessor and have it ready for submission to the BIR, together with the required documents.

The BIR usually conducts an ocular inspection to check the classification of the property (i.e., whether residential or commercial, fishponds, agricultural land, etc.) and its exact location. This is done to make sure that the specific zonal value for tax computation during desk assessment by the BIR assessor is correct).

e. Be ready to submit valid government issued IDs for the buyer and seller and also the one paying the capital gains tax. Prepare a photocopy of each and ask the buyer and seller to sign at the side of the ID photocopy.


f. Have your Tax Identification Number (TIN) ready (both for the seller and buyer).

 
19. Apply for payment of the Documentary Stamp Tax (DST) at the same BIR Office. Fill out BIR Form 2000-OT in triplicate.

Note that the DST is 1.5% of the selling price or zonal value which ever is higher.

Important note: the DST must be paid within 5 days after the close of the month. Normally you should pay DST together with the CGT at the BIR’s Authorized Agent Bank (AAB) to save time and effort and expenses.

20. When all the required documents have been submitted and the required CGT and DST computed, go to the AAB, usually near the BIR Revenue District Office to file the CGT Return (BIR Form 1706) in triplicate. Fill out the bank payment form. Pay the amount computed by the BIR. Get the Receipt issued by the AAB (this is the Payment Form that bears the bank machine validation).

21. Note that the CGT tax rate of 6% of the selling price or zonal value of the property which ever is higher.

22. Remember to pay within the 30 days deadline set for the payment of the CGT from DAS notarization date and AR date. (Last time I remember, the BIR assessor said he is basing it on the AR date).

Important reminder: Because you’ll be paying the CGT to the BIR and the DST at the same time during the same trip, make sure that you’re aware of the deadlines of both CGT (within 30 days) and DST (5 days after the close of the month).

Based on the above deadlines, it’s best if you can date your DAS and AR during the first week of the month. You can pay during the second week and you'll have enough time to make sure both your CGT and DST are paid way before deadline to avoid hefty penalties.

23. In case of failure to meet the 30 days deadline, pay the following:

· Surcharge – 25% for late payment

· Interest – 20% per annum

· Compromise penalty

24. After paying for the CGT and DST, return to the BIR Revenue District Office and show the bank receipts for the CGT and DST.

The BIR will later inform the taxpayer of the result of the ocular inspection and if the taxes computed and paid are already sufficient. The buyer will be asked to go back to the BIR office to get the Claim Slip. This will show the date when he needs to come back to claim the BIR Certificate Authorizing Registration (CAR).

25. Upon claiming of the CAR from the BIR, go to the Provincial Treasurer and apply for the payment of the Transfer Tax. Submit the required documents.

The transfer tax rate is ½ of 1.0% for provinces and ¾ of 1.0% for cities, in accordance with the Local Government Code.

Important reminder: The Provincial Treasurer will not accept any application for transfer tax payment without the CAR issued by the BIR. It will be a waste of time to go to the Treasurer’s office if the BIR hasn’t issued the CAR yet.

26. After paying the transfer tax at the Provincial Treasurer and receiving the transfer tax receipt, go to the Register of Deeds (RD) (in our case in Lingayen City) and apply for the transfer of title to the new owner.

At Lingayen City, the RD Office is just one or two blocks away from the Provincial Treasurer.

The buyer usually submits the CAR issued by the BIR, a copy of the DAS, copies of CGT and DST receipts, transfer tax receipt, and other documents that the RD Office may require.

Registration fee is usually ¼ of 1.0%.

The RD Office usually gives the applicant a claim slip showing the estimated completion date for the new title. You may have to make a few follow-ups at the RD office. The clerk on duty checks the RD online system to check the latest status of the processing of new title. She will usually give a new claim date after your follow up.

27. Once the new title is claimed, apply for a new TD in the new owner’s name at the municipal assessor’s office.

Usually the pertinent documents required are: copy of the new title, copy of BIR CAR, copy of tax receipts showing payment of required taxes, and other documents that the assessor may require.

In our case in Binmaley, after the new TD is typed and signed by the municipal assessor, the applicant is requested to take the TD to the Provincial Assessor in Lingayen City (beside the Provincial Treasurer Office in the same building) for approval. A copy of the new signed TD will be given to the new owner.


For a complete list of Fish Pond Buddy blog posts on fish farm-related topics, please click the Index page.