How to Make Coconut Oil and Coconut Milk Residue ("Latik")
Wanting to skimp on medicine cost, my farm folks often go for home remedies to cure simple body aches, back pains, and even pinched nerves.
They do physical work and are prone to such minor ailments. Once in a while they meet work-related accidents. Like my worker, Noli, who recently slipped and fell into the pond while hauling cut branches to the garbage pit. Luckily, he had only minor bruises and slight back pain.
For relief, they take herbal cures, go to the “hilot” (touch/massage therapist), or use medicines/antiseptics bought from a generic drug store in the town proper. Note: we do keep a first aid kit and stock a few items in our medicine cabinet.
Click this for my related post on Common Medicinal Plants, Fruits, and Trees and this for Traditional Healing in the Fish Farm, which includes therapeutic/pressure massage (“hilot”).
For today, I’ll write about how we make coconut oil at the fish farm.
For this purpose, we use our own nuts (the mature brown nuts, not the green ones). They usually fall naturally into our ponds or dikes. For a few, we pick them off the top of the tree using a hooked long pole.
 |
| Picking brown nuts from a coconut tree |
 |
| Picker holding two brown nuts |
Both products go through the same process, except that turning coconut milk into oil takes more time and a few more steps.
I thought of featuring coconut oil-making in my next blog, after I saw my overseer, Lyn, grate the meat of a newly cracked brown coconut.
I told her “Wait, let me take some pictures of what you’re doing.” I thought she was preparing some lunch dish cooked in coconut milk.
But she told me that they had run out of stock of "hilot" (therapeutic/pressure massage) oil. And they’re making a new batch. They always have it in stock for home use.
How do they apply oil? By themselves, such as on parts of the arms, feet, legs, or back that they can reach. For back pain cure, a sister or daughter massages the oil on upper/lower back and along spine. In some cases, they invite an elderly lady "hilot" (touch/massage therapist) (a neighbor), to perform a more thorough massage.
The coconut massage oil has three main ingredients – coconut oil, diced fresh ginger, and a bit of kerosene. As substitute for kerosene, aromatic wood chips (from a tree that may be some kind of sandalwood or teak, I’ll find out later) are used.
This is how they make coconut oil.
A. Materials and Tools
1. Brown coconut
2. Grater
3. Bolo knife
4. Small plastic basin
5. Strainer
B. Procedures
Cracking Open the Brown Coconut
1. Get four pieces of brown coconut. Make sure the nut is still good. If it’s too light, it’s no good and has no meat. If shaken and there’s water inside, it can be used for oil.
 |
| Two newly picked brown coconuts |
2. Using a bolo knife, remove first the thick outer husk cover of the nut. Start by making a vertical cut along the thick outer skin of the nut from top to bottom. Cut should be deep enough to completely slice the husk down to the shell.
 |
| Making the first vertical cut along the thick outer husk |
3. Then make another short slice 3 inches away at the middle. With the left arm holding down the nut and right hand holding the bolo (with the blade end inserted under the husk), twist the nut counterclockwise. The first slice of husk will be pried loose.
 |
| Prying loose the second slice of husk from the shell |
4. Make another short vertical cut 3 inches away at the middle. You’ll have another slice of the husk that you can pry loose.
5. Make other slices on the remaining husk cover and pry them loose until the inner hard shell is fully exposed.
 | |
| Prying loose the third and fourth slices of husk from the shell; slice and pry off the remaining husk portion until inner hard shell is fully exposed |
 |
| A fully exposed inner hard shell of the nut after dehusking |
6. Crack open the dehusked shell of the nut. Pour the coconut water into a pitcher.
 |
| Preparing to crack open the hard shell of a dehusked nut |
 |
| About to crack open a dehusked nut held by the left hand |
 |
| Pouring fresh coconut water into a plastic pitcher (try a glass or two - it's thirst quenching, sweet tasting, healthy juice; it's one of my favorites at the farm). |
 |
| Slicing the dehusked shell into two |
Coconut Apple – a Bonus
I was watching my assistant, Noli, crack open the matured brown coconuts. Lyn, my overseer, was already preparing our two graters to be used for the task.
After the nuts were cracked and the remaining coconut water emptied into the pitcher, Noli took out a sponge-like ball inside the shell. It's called coconut apple (“pala” in Pangasinense) which Noli handed to me to eat.
 |
| A coconut apple seen sitting at the bottom of the coconut meat after opening the shell |
 |
| A bigger coconut apple from another brown nut |
I’m familiar with this ball-like part of the meat because I’ve tasted a number of them. All I know is how refreshing and wonderful it tastes. Sweetish, soft and moist. I eat it fresh from the coconut shell that was just sliced open.
It’s this spongy ball-like yellow whitish material that develops inside the coconut. Later it becomes a young coconut seedling that shoots out of the husk.
Anyway, let’s go to the next steps.
Grating the Coconut Meat/Extracting the Milk
8. Get a coconut grater and a clean plastic basin.
9. Proceed to grate a half sphere of the coconut shell to remove the white coconut meat inside.
 |
| Removing the white coconut meat from a dehusked shell using a grater |
11. Put the grated meat in a plastic basin.
12. Pour hot water into the basin with the grated coco meat, then mash.
 |
| Pouring hot water into a basin of grated coconut meat |
 |
| Mashing the grated coconut meat to extract the milk |
13. Pour tap water. Mash some more and squeeze out the milk.
 |
| Adding tap water |
 |
| Mashing the grated coconut meat some more |
14. In the basin, squeeze out the milk from the mashed grated meat.
 |
| Squeezing out the milk |
15. Transfer the squeezed grated meat into another clean plastic basin.
 |
| Transferring the squeezed out meat or pulp to another plastic basin |
16. Meanwhile, pour the basin containing the milk into another basin using a strainer.
The coconut milk will then drip into the basin and the grated meat will remain in the strainer.
 |
| Pouring milk into a basin using a strainer |
17. Squeeze out the grated meat in the strainer, to extract any remaining milk.
 |
| Squeezed out pulp left on strainer; the first coconut meat extract which is thicker and creamier in a basin. This first extract is called coconut cream ("kakang gata") |
18. Set aside the coconut pulp (squeezed out coconut meat)(“sapal” in Tagalog). Also set aside the first extract of coconut cream in preparation for the second extract.
19. Do a second mashing and squeezing by pouring a little water on the coconut pulp. That is, do Steps 13 to 18. The second coconut meat extract is thinner and is called coconut milk.
Note: The coconut meat residues or pulp are used in our farm as ingredient for native pig feeds. Experts say that these can be made into coconut flour.
Cooking the Coconut Milk
20. Pour the coconut cream/milk from the plastic basin (these are the first and second extracts) to a cooking pan.
 |
| Pouring coconut milk into a pan atop a clay stove |
21. Boil the coconut milk for about an hour and a half until you see the oil with brown coconut milk residues (called "latik" in Tagalog).
 |
| Coconut milk residues "latik" can be seen in the pan just before it is removed from the clay stove (pls. excuse the off center photo shot) |
22. Pour the oil into a bowl. Then keep the "latik" for use as topping for "ube kalamay" (purple yam dessert made from shredded purple yam, glutinous rice, coconut milk, sugar) or "biko" (common local delicacy made from ground glutinous rice, coconut milk, and brown sugar).
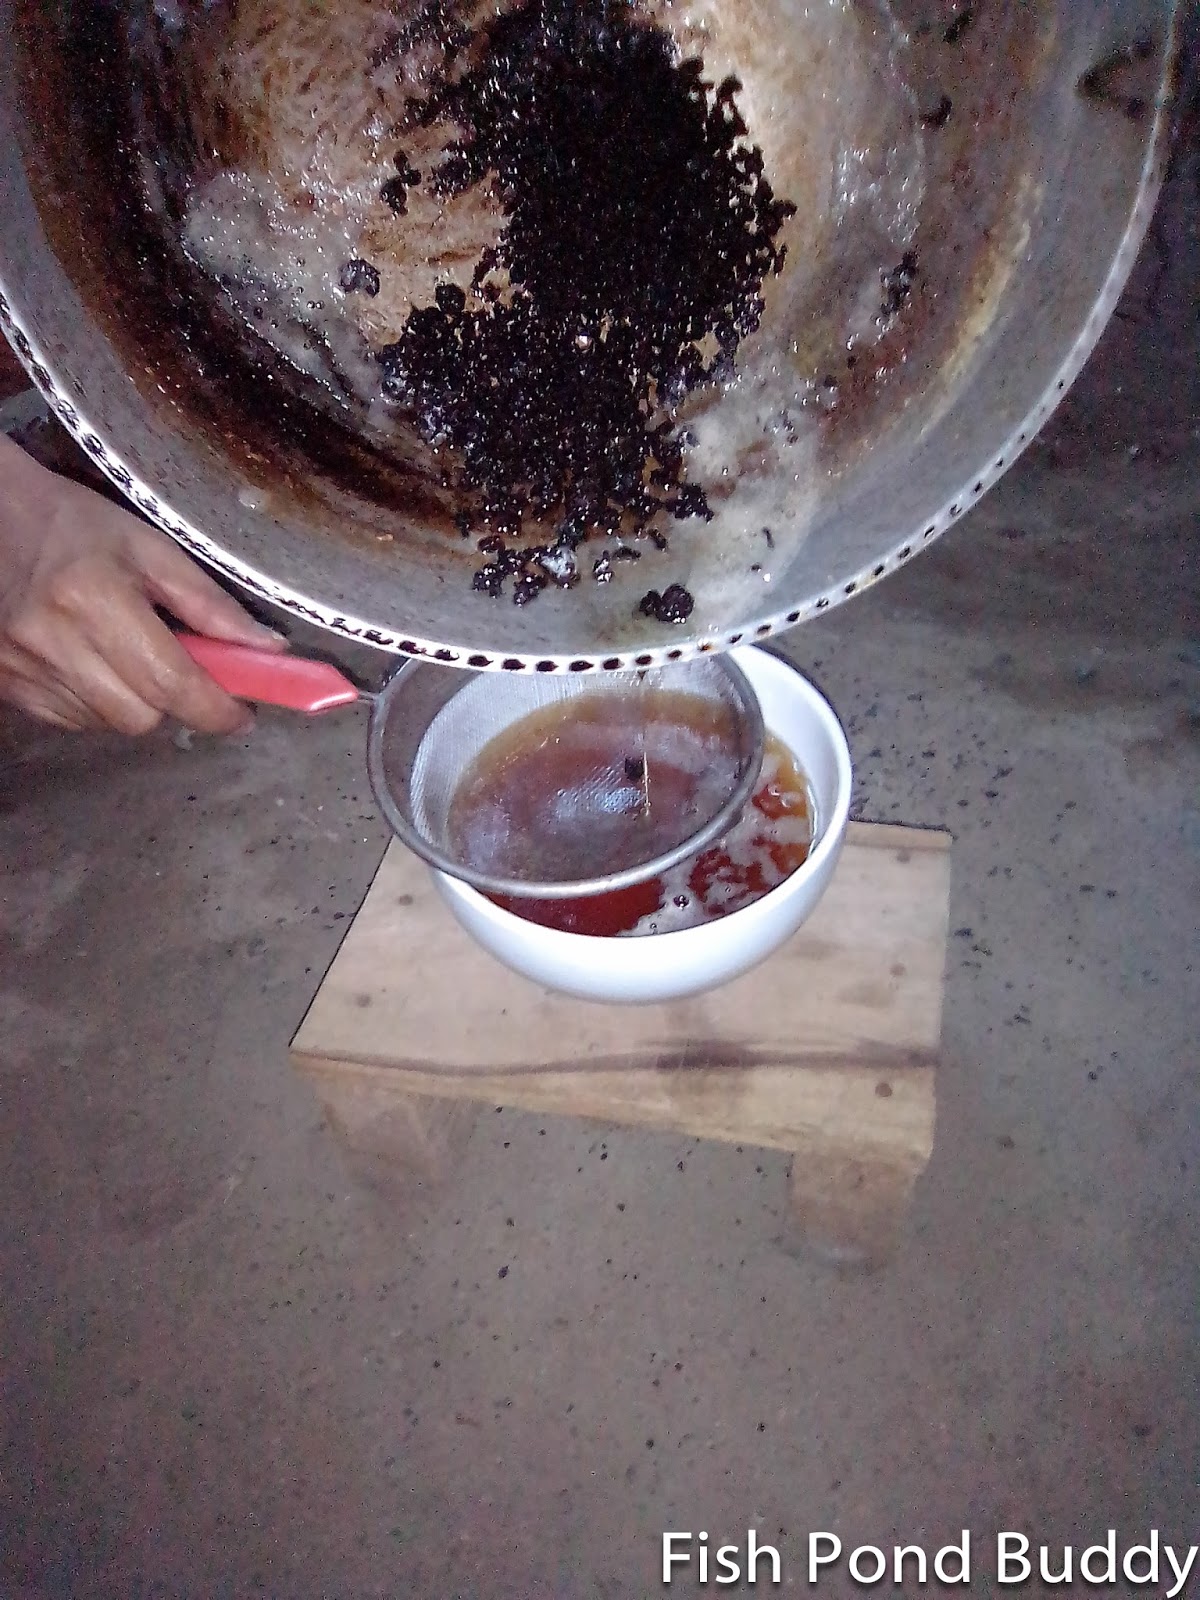 |
| Pouring oil into a bowl through a strainer |
 | ||||||||||||||||||||||||||||||||||||||||||||||||||||||||
| Brown coconut milk residues ("latik") in a coconut shell |
 |
| Coconut oil and coconut milk residues |
23. To make "hilot" (therapeutic/pressure massage) oil, mix diced ginger with the coconut oil and add kerosene or aromatic wood chips.
 |
| Ingredients of "hilot" oil in our fish farm village - kerosene (top), coconut oil (right), diced ginger (bottom); the combined mix at left. (Note: above photo was taken from my blog post on traditional healing) |
 |
| Aromatic wood chips can be used instead of kerosene |
 |
| A jar of "hilot" oil combining all three ingredients. (Note: above photo was taken from my previous blog post on traditional healing) |
For a complete list of Fish Pond Buddy blog posts on fish farm-related topics, please click the Index page.