Pages

Monday, May 15, 2017

How to Make Coconut Oil and Coconut Milk Residue ("Latik")


How to Make Coconut Oil and Coconut Milk Residue ("Latik")


Wanting to skimp on medicine cost, my farm folks often go for home remedies to cure simple body aches, back pains, and even pinched nerves.

They do physical work and are prone to such minor ailments. Once in a while they meet work-related accidents. Like my worker, Noli, who recently slipped and fell into the pond while hauling cut branches to the garbage pit. Luckily, he had only minor bruises and slight back pain.

For relief, they take herbal cures, go to the “hilot” (touch/massage therapist), or use medicines/antiseptics bought from a generic drug store in the town proper. Note: we do keep a first aid kit and stock a few items in our medicine cabinet.

Click this for my related post on Common Medicinal Plants, Fruits, and Trees and this for Traditional Healing in the Fish Farm, which includes therapeutic/pressure massage (“hilot”).

For today, I’ll write about how we make coconut oil at the fish farm. 


For this purpose, we use our own nuts (the mature brown nuts, not the green ones). They usually fall naturally into our ponds or dikes. For a few, we pick them off the top of the tree using a hooked long pole.

Picking brown nuts from a coconut tree
Picker holding two brown nuts


We use brown coconuts: (a) to make coconut milk, or (b) coconut oil. Click this for my related post on the Uses of the Coconut Tree in our Bangus (Milkfish) Farm.


Both products go through the same process, except that turning coconut milk into oil takes more time and a few more steps.

I thought of featuring coconut oil-making in my next blog, after I saw my overseer, Lyn, grate the meat of a newly cracked brown coconut.


I told her “Wait, let me take some pictures of what you’re doing.” I thought she was preparing some lunch dish cooked in coconut milk.

But she told me that they had run out of stock of "hilot" (therapeutic/pressure massage) oil. And they’re making a new batch. They always have it in stock for home use.

How do they apply oil? By themselves, such as on parts of the arms, feet, legs, or back that they can reach. For back pain cure, a sister or daughter massages the oil on upper/lower back and along spine. In some cases, they invite an elderly lady "hilot" (touch/massage therapist) (a neighbor), to perform a more thorough massage.

The coconut massage oil has three main ingredients – coconut oil, diced fresh ginger, and a bit of kerosene. As substitute for kerosene, aromatic wood chips (from a tree that may be some kind of sandalwood or teak, I’ll find out later) are used.

This is how they make coconut oil.

A. Materials and Tools


1. Brown coconut

2. Grater

3. Bolo knife

4. Small plastic basin

5. Strainer

B. Procedures


Cracking Open the Brown Coconut


1. Get four pieces of brown coconut. Make sure the nut is still good. If it’s too light, it’s no good and has no meat. If shaken and there’s water inside, it can be used for oil.


Two newly picked brown coconuts
 
2. Using a bolo knife, remove first the thick outer husk cover of the nut. Start by making a vertical cut along the thick outer skin of the nut from top to bottom. Cut should be deep enough to completely slice the husk down to the shell.


Making the first vertical cut along the thick outer husk


3. Then make another short slice 3 inches away at the middle. With the left arm holding down the nut and right hand holding the bolo (with the blade end inserted under the husk), twist the nut counterclockwise. The first slice of husk will be pried loose.
 

Prying loose the second slice of husk from the shell


4. Make another short vertical cut 3 inches away at the middle. You’ll have another slice of the husk that you can pry loose. 

5. Make other slices on the remaining husk cover and pry them loose until the inner hard shell is fully exposed.

Prying loose the third and fourth slices of husk from the shell; slice and pry off the remaining husk portion until inner hard shell is fully exposed
A fully exposed inner hard shell of the nut after dehusking

6. Crack open the dehusked shell of the nut. Pour the coconut water into a pitcher.

Preparing to crack open the hard shell of a dehusked nut

About to crack open a dehusked nut held by the left hand

Pouring fresh coconut water into a plastic pitcher (try a glass or two - it's thirst quenching,  sweet tasting, healthy juice; it's one of my favorites at the farm).

7. When the nut is fully emptied of coconut water, resume cracking the shell into two semi-spheres.
 

Slicing the dehusked shell into two

Coconut Apple – a Bonus
 

I was watching my assistant, Noli, crack open the matured brown coconuts. Lyn, my overseer, was already preparing our two graters to be used for the task.

After the nuts were cracked and the remaining coconut water emptied into the pitcher, Noli took out a sponge-like ball inside the shell. It's called coconut apple (“pala” in Pangasinense) which Noli handed to me to eat.


A coconut apple seen sitting at the bottom of the coconut meat after opening the shell

A bigger coconut apple from another brown nut

I’m familiar with this ball-like part of the meat because I’ve tasted a number of them. All I know is how refreshing and wonderful it tastes. Sweetish, soft and moist. I eat it fresh from the coconut shell that was just sliced open.

It’s this spongy ball-like yellow whitish material that develops inside the coconut. Later it becomes a young coconut seedling that shoots out of the husk.

Anyway, let’s go to the next steps.

Grating the Coconut Meat/Extracting the Milk
 

8. Get a coconut grater and a clean plastic basin.
 

9. Proceed to grate a half sphere of the coconut shell to remove the white coconut meat inside.

Removing the white coconut meat from a dehusked shell using a grater
 10. Do this for all four coconuts.

11. Put the grated meat in a plastic basin.

12. Pour hot water into the basin with the grated coco meat, then mash. 


Pouring hot water into a basin of grated coconut meat

Mashing the grated coconut meat to extract the milk

13. Pour tap water. Mash some more and squeeze out the milk.

Adding tap water

Mashing the grated coconut meat some more

14. In the basin, squeeze out the milk from the mashed grated meat.


Squeezing out the milk

15. Transfer the squeezed grated meat into another clean plastic basin.

Transferring the squeezed out meat or pulp to another plastic basin

16. Meanwhile, pour the basin containing the milk into another basin using a strainer.

The coconut milk will then drip into the basin and the grated meat will remain in the strainer.


Pouring milk into a basin using a strainer

17. Squeeze out the grated meat in the strainer, to extract any remaining milk.


Squeezed out pulp left on strainer; the first coconut meat extract which is thicker and creamier in a basin. This first extract is called coconut cream ("kakang gata")

18. Set aside the coconut pulp (squeezed out coconut meat)(“sapal” in Tagalog). Also set aside the first extract of coconut cream in preparation for the second extract.

19. Do a second mashing and squeezing by pouring a little water on the coconut pulp. That is, do Steps 13 to 18. The second coconut meat extract is thinner and is called coconut milk.

Note: The coconut meat residues or pulp are used in our farm as ingredient for native pig feeds. Experts say that these can be made into coconut flour.

Cooking the Coconut Milk
 

20. Pour the coconut cream/milk from the plastic basin (these are the first and second extracts) to a cooking pan.

Pouring coconut milk into a pan atop a clay stove

21. Boil the coconut milk for about an hour and a half until you see the oil with brown coconut milk residues (called "latik" in Tagalog).


Coconut milk residues "latik" can be seen in the pan just before it is removed from the clay stove (pls. excuse the off center photo shot)

22. Pour the oil into a bowl. Then keep the "latik" for use as topping for "ube kalamay" (purple yam dessert made from shredded purple yam, glutinous rice, coconut milk, sugar) or "biko" (common local delicacy made from ground glutinous rice, coconut milk, and brown sugar).
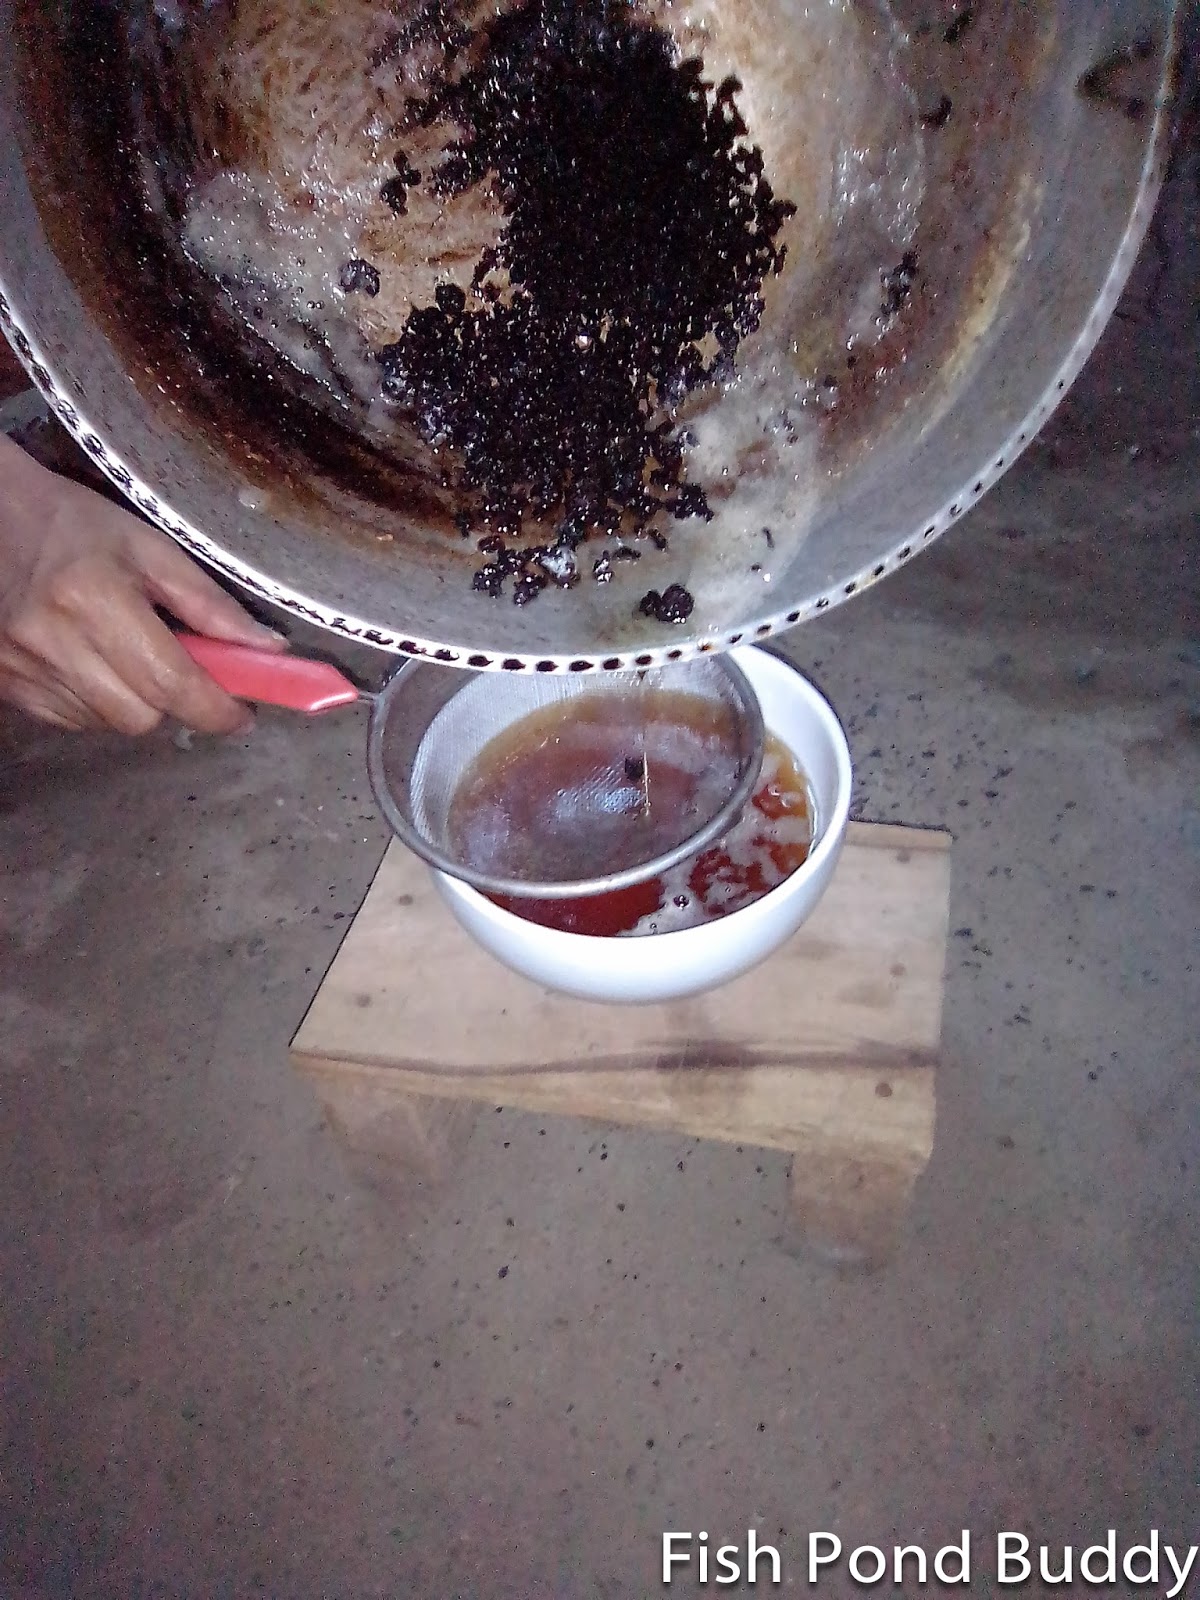
 
Pouring oil into a bowl through a strainer
 
Brown coconut milk residues ("latik") in a coconut shell


Coconut oil and coconut milk residues

23. To make "hilot" (therapeutic/pressure massage) oil, mix diced ginger with the coconut oil and add kerosene or aromatic wood chips. 

Ingredients of "hilot" oil in our fish farm village - kerosene (top), coconut oil (right), diced ginger (bottom); the combined mix at left. (Note: above photo was taken from my blog post on traditional healing)

Aromatic wood chips can be used instead of kerosene

A jar of "hilot" oil combining all three ingredients. (Note: above photo was taken from my previous blog post on traditional healing)


For a complete list of Fish Pond Buddy blog posts on fish farm-related topics, please click the Index page.


Friday, April 21, 2017

How to Make a Bird Trap at the Fish Farm


How to Make a Bird Trap at the Fish Farm
 

Yesterday, Nonong (brother of my fish farm overseer) dropped by for a visit. He’s from Sta. Barbara, Pangasinan (four towns away from our farm in Binmaley). He visits only a few times a year. Often, he comes to the farm just to hunt for local pond birds. 

As we expected, he asked her sister’s permission to scout around the farm and look for bird trails. He and his family love to cook and eat his bird catch, as they’re considered local delicacies.

Nonong works as a furniture maker but has a reputation for being a prolific trapper of birds. I was at the farm then when he showed up and he smiled, took my hand, and raised it to touch his forehead (“magmano” - local gesture of greeting an elder and showing respect).

At this time, the pond water levels at the bangus ponds are quite low, April being a dry season month. A week ago (April 5, 2017), Pagasa (the local weather bureau) announced the end of the northeast monsoon and start of the “summer” or dry season.

We have just recently drained our Main pond (for grow-out) for the final harvest. We already applied tea seed powder to remove predator fish, chicken manure, and some inorganic fertilizer. Pond water has seeped back in. Water level, at present, is way below the knee. The sides of the surrounding earth dikes (normally under water) are bare and cheerily expose themselves to the sun.

Working at the bottom of the dikes at the edge of the water is possible at this time. My workers started to check out the dikes, remove unwanted pond grass at the sides, and large debris from the shallow water, plug a few holes, make some repairs, etc.

This narrow strip of land between dike bottom and the water edge is also an attractive feeding ground for the common bush hens (“sikling” in Pangasinense). They can be seen scrounging the area for earthworms, insects, seeds and other tiny creatures at the water edge.

Before writing this blog, I looked up the common bush hen (amaurornis olivacea) in the IUCN Red List of Threatened Species. It’s reassuring to know that our “sikling” bird (common bush hen), is not at all threatened. It falls under the “least concern” category of the Red List. Endemic to the Philippines, it’s found in the entire country, except Palawan. So I'd like to think  it’s really safe to catch or trap a few of them for food.


A trapped bush hen ("sikling" bird)

Lyn, my overseer, has told me how her brother learned about bird traps. His method is the same primitive and traditional way traps are made by their own father, uncles, and grandfather before him.

Although simple and primitive, a bamboo bird trap is not the usual tool known to city folks (they'd rather tinker with their smart phones and tablets). Nonong has been using it with a good measure of success. So I thought why not write about it.

For sure, there are various ways of trapping a bird. This article covers only the method used in our farm. It’s simple, cheap and effective.

So here we go.


A. Materials and Tools
 

1. Bamboo

2. A piece of nylon cord
 

3. Bolo knife or kitchen knife


B. Procedures

This simple bird trap has two main parts – a bamboo stick and a nylon string.


Bamboo Sticks
 

1. Get a piece of bamboo pole. Saw off about 15 inches long piece.

2. Using a bolo knife, slice the bamboo pole into several sticks (each about twice as thick as a barbecue stick).


Bamboo sticks of right length and thickness


3. Smoothen the sticks by removing rough edges, until smooth to touch.

Removing rough parts of the stick
4. Sharpen the other end (for sticking into the earth ground).

Sharpening the other end of stick

5. For each stick, make an inch long incision from one end, like splitting the stick lengthwise from the top.

Making an inch long incision at one end where string is to be attached


Nylon Strings

6. Get a piece of nylon rope or cord, not the braided one but the strand type (that is, consisting of several strands twisted together).


A nylon rope or cord made up of strands twisted together

7. Cut the length of rope or cord to around a foot and a half.

8. Untwist the rope or cord, to free up the finer nylon strings. For each trap, use one fine string.


See the thin orange strings (attached to the sticks) taken from one single nylon cord after untwisting the strands

Tying and Loop-Making

9. Tie one end of the string to the bamboo stick as follows:

a. Insert one end of the nylon string into the bamboo slit.


Inserting one end of string between the slit in the bamboo stick

b. Wind four times around the stick.

c. Make a small loop then insert into the slit.

d. Pull tight.


Pulling string tight to complete tying one end of string to the stick

e. Before making the loop at the other end of the string, straighten the nylon string by repeatedly running thumb and index finger through the string and pulling or stretching it.

This will remove any crooked or curly portions of the string and prevent the loop from sagging or twisting.

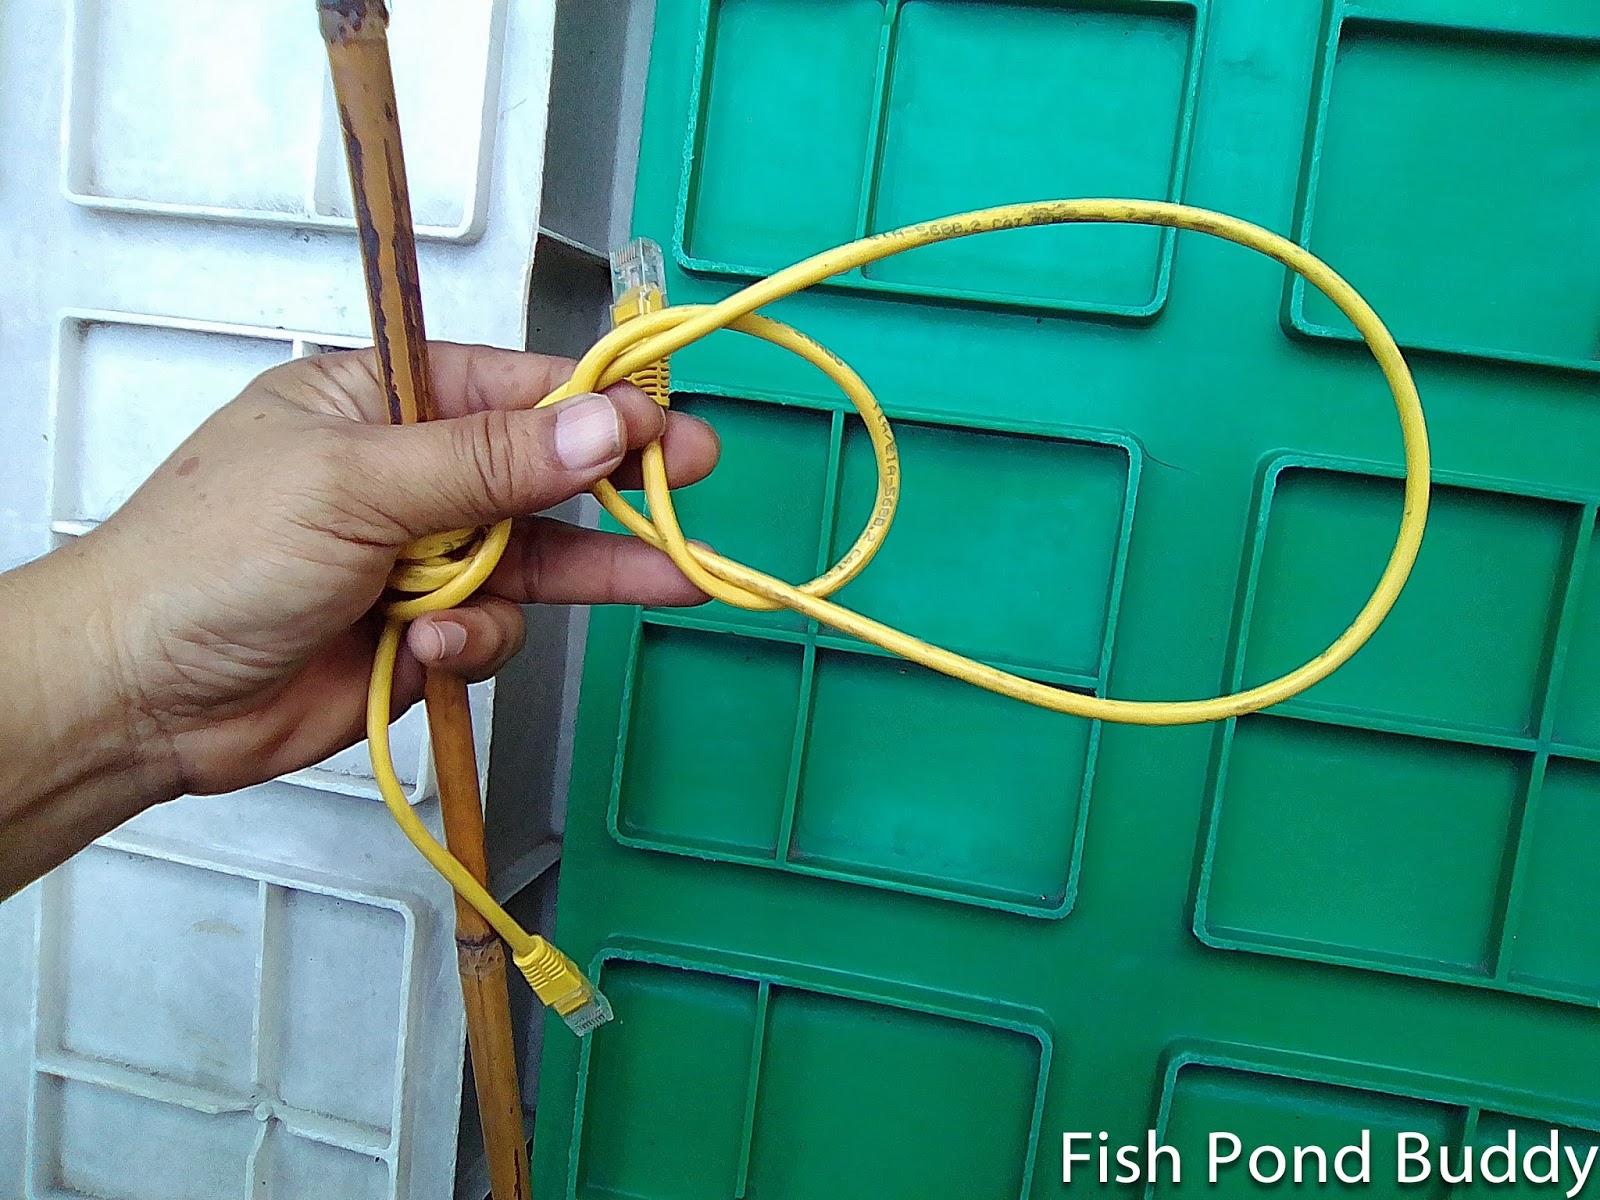
10. At the other end of the string, make a big loop or a “noose knot” as follows:

a. Hold the stick (with attached nylon string) in a vertical position with your left hand. Hold the other end of the string with your right hand.


  • Starting to make a loop with the other end of the string (for demo purposes, Nonong used a thicker green string)

b. Hold the running (working) end of the attached string with your right hand and pull it away from the stick (see above photo).

c. Bring the running end of the string (with your right hand) back toward the stick (held by your left hand). This will form a “bight” (a C-shaped section of the bent string).


A bight formed from the bent string (like a "C"), as viewed from front

The bight as viewed from the back. Note: this is just for illustration purposes (use of a thick stick and a yellow cable for easy viewing)

d. Pass the running end from behind the upper arc of the "C" and cross over to the upper arc, and down.

Crossing the running end of string over the upper arc of the "C"

e. After crossing over the upper arc of the "C", pass the string over the lower arc, forming a small circle to your left.


Passing the end of string over the lower arc of the "C", forming a small circle to the left of the picture
 
f. Pass the running end under the lower arc of the "C" and into the circle.


Passing the string under the lower arc of the "C" and into the small circle

g. Pull up. You now have a loop.


A completed loop attached to the bamboo stick (as viewed from front) - this is the simple bird trap 
A completed loop, as viewed from the back

h. To prevent slippage of the loop, make a stopper knot (also called "overhand knot") at the running end of the string. 

Do this by making a tiny loop at the end of the string, passing the running end through it, and pulling to tighten (see above first photo - stopper knot is an inch away from the end of the green string).  

The trap works this way. The bird walks along the trail. As it passes the bamboo stick (positioned along the trail), the head of the bird gets snagged inside the nylon loop. As the bird tries to escape (by moving forward or backwards), the loop tightens. Either way, the bird is trapped and immobilized.


11. Do Steps 9 and 10 for all the other sticks. For example, Nonong made around 40 pieces of traps (each with a bamboo stick and nylon string loop).

12. Carefully choose the sites along the dike where the bush hens are likely to pass along a familiar trail (on their way from the bottom of dike going up to ground level). 


According to Nonong and my overseer, Lyn, bush hens are creatures of habit. They are likely to use the same trail over and over. Experienced trappers do keep an eye on such bird trails where they can effectively set their traps.

Bird trap being placed along a suspected bird trail

A common bush bird ("sikling") caught after trap was laid

Picking up the trapped immobilized bird

After trapping several bush hens, get ready for cleaning and cooking of your catch. Pls. click this for an earlier blog on how to clean and cook "sikling" birds.

For a complete list of Fish Pond Buddy blog posts on fish farm-related topics, please click the Index page.

Saturday, December 17, 2016

Growing Livestock at the Fish Farm


Growing Livestock at the Fish Farm 

Four months ago, we took in a pair of goats (doe and buck) and seven hybrid piglets for fattening in the farm. A friend also gifted us a pair of native piglets.


A pair of newly acquired goats (doe at left is black with white patch, buck is all black)

Seven piglets (about 50 days old) which were bought for fattening
A pair of native pigs (initially housed in a crude pen under the lumber shed)


By bringing in these animals, we diversified our farm produce and expanded the use of the fish farm property. That is, grow bangus, tilapia, white prawns in the ponds, and keep farm animals on the earth dikes. We also hoped that this will add to the earnings of my farm workers who'll share in the profits of the livestock project.

My farm overseer and cook take turns tending the fattening pigs. Thrice a day, they clean the pig house, bathe the pigs, and feed them. For feeds, we fed the piglets commercial starters for the first 90 days. Later it's a mix of growers and some other items (such as corn bran, rice bran, wheat bran). To the mix, they add chopped kangkong (swamp cabbage) stems and leaves.


Measuring various hog feed mix items (commercial feeds, corn, rice bran, wheat bran)


Pouring water into the mix
Adding chopped "kangkong" (swamp cabbage) or other greens to the wet mix to produce pig slop

My assistant caretaker tends the goats. Daily, he retrieves the pair from the goat shed and puts them to pasture. The goats graze on weeds and other wild plants on the earth dikes. Late afternoon (or earlier when it rains), the goats are brought back to their shed.

Pig House for Fatteners
 

To house the pigs, we built a small bamboo structure for the fatteners. Around 5 meters by 2 meters, with bamboo posts, roof frame, sidings and gates. On top are GI sheets for the roof. It has concrete floor with concrete feeder and drinker troughs.

Completed bamboo pig house viewed from west

Our main grow-out pond to the north viewed from the pig house

Before we built the house, we had to prepare the earth dike on which to build the base – reinforce it, widen and level it.


Filling the sacks with earth to reinforce, widen and raise the dike where the pig house will be located

Layered sacks of earth piled on top of each other (this method of earth piling will prevent erosion; notice the slope where base is wider)

Layers of earth-filled sacks viewed from up a nearby tree

We bought some drinker nipples but are yet to install them later.

To shield the hogs from rains and wind, we put protective tarp screens. These can be rolled up or down, depending on weather.

Pig Sty for Native Pigs


Native pigs are normally free-ranging. This is good because we won’t need any pig structure – or so we thought. But after letting them out to graze, the pigs quickly ploughed out the earth dikes of our farm. They uprooted everything in their path – plants, weeds, root crops, etc. in search of food. They were tireless earth diggers. Using their snouts, they dug up the ground, loosened up the soil, ate up any soil creatures and other morsels they could find.

Our fish farm doesn’t have wider tracts of land suited to free ranging (say, like a rice field). So we decided to keep our native pigs in confinement instead. Just like their hybrid fattening cousins. Besides, we can’t allow our earth dikes to be eroded. Bad for our fish in the ponds.

Initially we built a pen under our lumber shed, half roofed and the other half open. It has no cement floor. So after awhile, when rains came, the earth floor turned really muddy. Because of their propensity for ploughing out the soil, the native pigs quickly turned the muddied floor into a mess. Result? Their food was stained with mud, drinking water soiled.


A crude enclosure under the lumber shed originally intended for the native pigs

Pair of native pigs seen resting on the earth floor (later became muddy when the rains came)

Finally, we had to put the native pigs in a separate section of our main pig house. It has cement flooring, feed and drinker troughs, so it’s easy to clean. After relocating them, we noticed that the supposed free-ranging pigs, though confined, seemed to like their new “habitat”. They became healthier, gained weight faster. 

A smaller compartment in the main pig house for our 2 native pigs

Goat Shed 


For the goat-raising project, we built a crude goat house made of bamboo. Located in the middle of the earth dikes between our two grow-out ponds. That’s where they stay overnight. In the morning, my goatherd takes the goats to a new grazing area around my farm, tying them up with a long rope. The doe grazes separately from the buck.

Being new in goat raising, I didn’t mind buying my initial stock from just any source - not really mindful of acquiring quality goat stock (such as Boer or Anglo Nubian, the more popular breeds in a tropical country like the Philippines). The idea is to just use any grazing goats, even native ones, to control weed growth in our farm.

It was my assistant caretaker who bought the pair from his neighbor. Turned out the pair of goats that we purchased were not the pure local native goats we expected.

Now that they’re a bit older, we can see that they have some features of a cross-bred goat. They’re bigger, black colored, had more bulk compared to those we see around the farm.

Last week, our doe gave birth to a kid. It came as a big pleasant surprise! My goatherd himself was surprised. He didn’t realize the doe was pregnant although my overseer suspected that it was so. How did it happen?

Well, after asking around, we learned that one of the grazing areas near the main entrance had been visited by a large herd of hybrid goats. One day our goatherd decided to put our goats to pasture in that area and left them there. My other farm workers noticed a large buck (probably a graded Anglo-Nubian, but not a purebred buck) loitering around. This buck stayed alone near our doe for hours.

The rest was history. The visiting buck succeeded in mating with our doe, which got pregnant, without anyone of us noticing.

The female offspring – well, she’s colored light brown, just like the color of the “stray” large buck that sired her.

It was a lucky break for us. Our goat stock (at least the first newly born female kid) got upgraded without our knowledge. Amazing. Can’t ask for more.

What We Feed Our Pigs 


For the first 90 days (age of piglets) or the first 45 days from date of purchase, we fed our piglets with commercial hog feeds (starters).

Thereafter and for the next 5 months, we fed them a combination of the following ingredients (we adopted the feeding tips of our Philippine Department of Agriculture (DA)):

· Commercial feeds (growers or finishers)

· Rice bran (locally called “rubber kono” or “darak”)

· Corn bran (“babang mais”)

· Wheat bran (“trigo”)

· Swamp cabbage (“kangkong") or

· Banana trunk or

· Vegetable or fruit rejects (disposed at public market)
 

Note: Some other ingredients are included per the DA tip, depending on availability in your farm (such as "ipil-ipil" leaves).

We buy the commercial feeds, rice bran (“darak”), corn bran (“babang
mais”), and wheat bran (“trigo”) at the feed supply shops at the public market. My farm workers gather swamp cabbage (“kangkong”) from around our farm and cut down a trunk from the banana clumps nearby. Sometimes, we get vegetable/fruit rejects for free from our friend-vendors at the public market.

To prepare the feeds: chop or slice the kangkong and banana trunk into small pieces and put in plastic basins. Sprinkle a bit of salt. Then mix all the above feed ingredients in a large plastic pail with some clean water. This type of wet feed (pig slop) is ready to be poured into the feeder trough. Don’t forget to fill the drinker trough with clean water.


My assistant caretaker chopping up the "kangkong" into small pieces (long, uncut stems and leaves are left uneaten).

Before feeding the fatteners (thrice daily), my farm workers make sure the cement floor and troughs are newly cleaned up and washed.


My farm overseer cleaning up the floor with water.
Note: photo shows only two remaining fatteners; others were already sold or slaughtered

Cleaning up the feeding and drinking troughs


Removing dirt and debris from the troughs using broomstick ("walis tingting")


While cleaning the pen, the workers also bathe the pigs to cool them down. Then, they're ready to be fed.

Bathing the pigs thrice a day to cool them down
Cleaned up floor and newly bathed pigs, waiting to be fed

Hybrid fatteners and native pigs at the feeding troughs

How To Monitor and Estimate the Weight of Our Fattening Pigs 

Commercial hog raisers usually weigh their hogs using a metal cage and a heavy duty weighing scale with a hook. The pig enters the cage (with its fixed weight known); the cage hooked up to the scale. The increment (in kilos) represents the pig weight.
 

Most backyard hog growers have no livestock scale for weighing their pigs. They go to a weighing station a few kilometers away to get live weight for a fee.

But it’s always best to have a good estimate of the weight of your fatteners at any time. How? Use the technique applied by backyard hog raisers (available at the internet).

· Measure the length of the pig (in inches) from base of tail to base of ear along the spine.

· Get the diameter of the body (in inches) (called “girth”) using a string or tape measure which is wrapped just behind the forelegs (think of armpit)

· Get the square of the measured diameter or girth in inches

· Multiply by the length in inches

· Divide the result by 400 to the get the estimated weight in pounds

· Divide the weight in pounds by 2.2 to get the weight in kilos

We tried this technique ourselves and compared the above “formula weight” to the actual scale weights for our 3 pigs. Unfortunately, the above “formula or derived” weights are consistently higher by around 7 to 8%. A possible explanation, I presume, is that the above formula is based on Western standards and experience, and applies to US hogs. Most likely, the hog breeds, type of feeds, and method of feeding in the US differ from those in local Philippine conditions.

To adjust this weight to local conditions, we reduced the derived weight further by 8% to get the “adjusted” weight. The result, based on our samples, is very close indeed to actual weight using a scale.

Thus the modified formula that applies to us locally (Philippine conditions) is:

(Length in inches x square of girth in inches) / 400 = weight in pounds / 2.2 = derived weight in kilos x 92% = adjusted weight in kilos

Selling the Fatterners 


For backyard growers, selling is a tricky part of the business. There is no ready market for fattened hogs. After feeding and caring the pigs for 4.5 to 5 months, they are supposed to be ready for disposal.

Live weight can range from 60 to 100 kilos per hog. After 4.5 months of feeding, two of my 7 hogs weighed over 90 kilos, two were in the 80 kilo range, two in the mid 70 range, while one was a laggard and was in the 60 kilo range.

Backyard growers are often at the mercy of pig brokers or private buyers who dictate live weight prices. Also, live weight prices are subject to seasonal fluctuations. Higher when Christmas season nears. Prices remain high first half of year, then drop after that during rainy season.

Brokers sense when backyard growers need to quickly dispose of their hogs. Growers have limited capital and have no financial leverage to negotiate. When hogs reach marketable weight, growers are anxious to sell their livestock to generate cash. Keeping the hogs longer means spending for more feeds and draining the household cash some more. So, it’s the brokers who have the upper hand and can dictate prices.

Increasing Profits from Backyard Piggery 


It’s plain to see that backyard growers who raise fattening hogs and sell all their hogs to brokers after 4 to 6 months hardly make any profit. Because of the low selling price per kilo live weight, sales would be minimal. Cost of major inputs (feeds and piglets), on the other hand, remain high and continue to increase. Resulting profits, thus, suffer.

Given this, it would be foolhardy to take this route, given the length of time, high cost, and amount of effort involved in caring for and feeding the fatteners.

So, what can backyard growers do?

Well, slaughter the pigs and sell meat cuts to end users. This is the only viable option.

In our case, we needed to slaughter one fattener every two weeks, cut them up into meat pieces, and offer them to farm neighbors and friends. For procedures on how to cut up a whole pig, pls. click this.


So far, we slaughtered 2 of our 7 fatteners. Another is scheduled for slaughter in a few days. Earlier, we sold 3 hogs to live weight buyers. The remaining one, we'll keep as our future sow.

The downside in selling pork retail to household consumers is that meat cuts are usually sold on credit – mostly two weeks to pay. Best way to implement this is to make use of canvassers who receive a commission (add-on) for every kilo of pork sold, collected and remitted.


Lastly, an important tip is to keep detailed records of all costs and expenses, sales and receivables. Also the types and quantities of feeds consumed. Without meticulous record-keeping, a backyard grower would have no idea if his piggery project makes money or not.

In addition to our goats and native pigs, we recently introduced native chickens in our fish farm (courtesy of my farm overseer). To learn about our experience with chickens, pls. click this.
 
For a complete list of Fish Pond Buddy blog posts on fish farm-related topics, please click the Index page.