Pages

Wednesday, October 4, 2017

How to Catch Tilapia Using Gil Net ("Tabal")


How to Catch Tilapia Using Gill Net ("Tabal")
 

I mentioned in one of my blogs (pls. click this) the presence of tilapia in our brackish water ponds, where we grow bangus as our primary crop. It’s as if they sprout from everywhere. Actually they start as tilapia eggs (that survived pest eradication). Or they come from our adjacent tilapia ponds through unseen holes in the perimeter net or dikes.
 

Considered as staple fish, tilapia are not exactly bad. They’re not predators but are considered competitors with bangus for feeds, pond space, and dissolved oxygen.

In my farm, we do allot two ponds exclusively for growing tilapia where they are allowed to breed and grow to market size.

From experience, we see quite a number of tilapias emerge in our bangus grow out ponds where they grow and breed. They then consume bangus feeds too. This is why we installed our bangus feeder devices (pls. click this and see this video), to keep tilapia out of the bangus feeder area.

Since tilapia command a decent enough market price (even enjoy unusually high price during certain months or weeks), we also include them in our harvest plans and schedules and sell them either alone or together with our bangus and vannameis.

Methods Used to Catch Tilapia
 

How do we typically catch tilapia then?

1. First is through the usual seine (“kalokor”) net, used during a typical harvest. (Pls. click this and go to the section on How to Harvest Bangus, Steps 6 to 9 on use of "kalokor"). The “kalokor” net catches everything in its path and the workers sort them out later.

2. By fishing rod – when we want to cook or grill a few pieces of fresh tilapia for lunch or dinner. I ask one of my pond persons to catch them using a crude bamboo rod with nylon line and hook using earthworm as bait.

3. By cage trap (“nasa”) - tilapias are lured into the cage (lowered into the pond bottom) using some sort of bait, then the cage is hauled out of the pond. The cage may or may not be provided with a pull string. We don’t use this device in our farm, but it's popular elsewhere. Because it can be used surreptitiously even during daytime, the cage trap ("nasa") is the preferred tool of the unscrupulous.

4. By gill net (“tabal”) - the net (with rubber floaters on top and lead sinkers at the bottom) is set up along the sides of the pond and with a few also placed across. The tilapia is trapped when it hits the fine strands of the net. The fish head is lodged in one of the holes, catching it by the gills - fish can’t dislodge itself moving forward or backward.

Catching Tilapia by Gill Nets
 

Catching tilapia by gill net is indeed an efficient and much cheaper way compared to using seine (“kalokor”) nets that employ several workers and entail higher costs.

Even only one worker can do it (i.e. nets are placed by him and the fish caught are removed by him). Further, we can also ask the same worker to sell the catch by himself at the Dagupan fish center. 
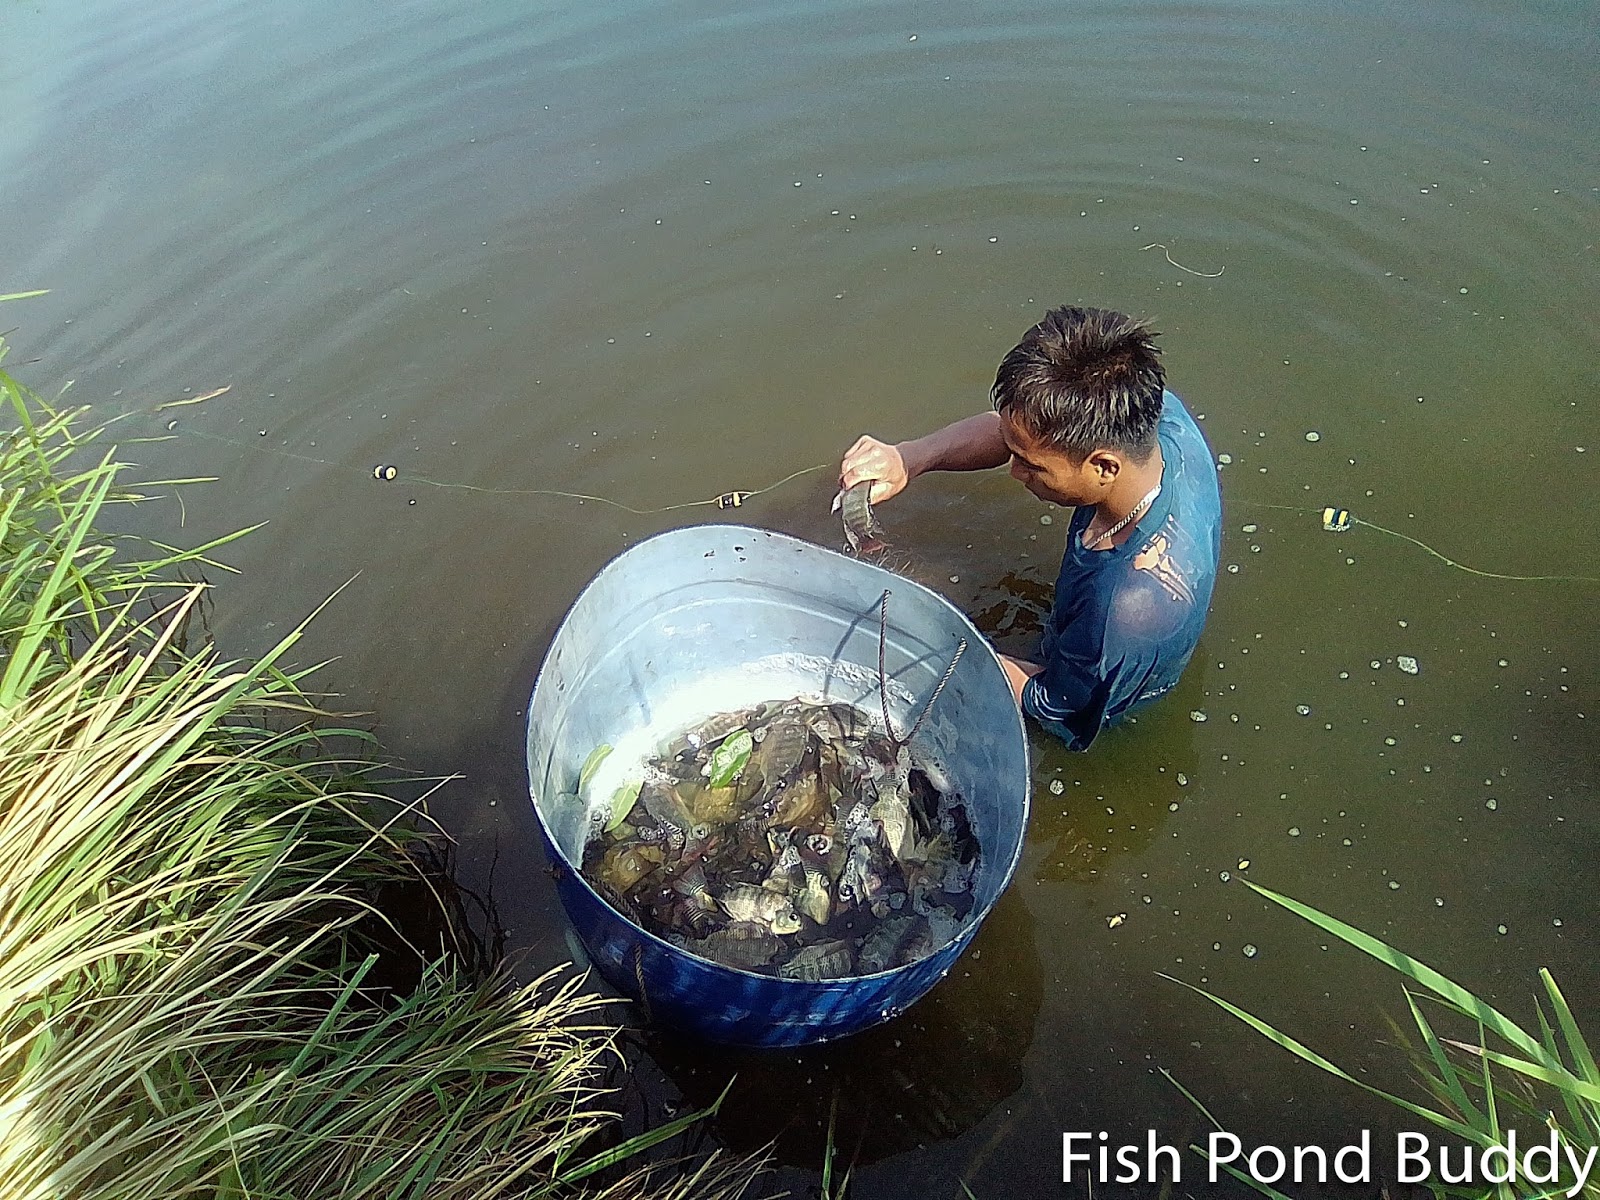

A worker untangling a trapped tilapia from the net and about to put it into a plastic drum with the other tilapia

Raising the gill net to check it out and finding 2 pieces of tilapia

Quantity of harvest can be easily increased. How? Simply install as many as 8 or 9 around the ponds and a few across. If you don’t have them, just rent the desired number of nets.
 

Gillnets ("tabal") placed all around the pond (see the line with the rubber floaters)

For transport, the worker can even ride a cheap public utility vehicle (jeepney) to Dagupan when, say, only 10 to 15 kilos are caught. Else, you can hire a driver to transport larger quantities of catch using a converted tricycle for cargo (“garong”) to the fish center. The "garong" can easily accommodate a couple of drums of tilapia.

Another advantage of using gill nets - you can project outright the average size of the catch. For example the use of the #5 nets (i.e., size of mesh hole) gives an average of 5 to 6 pieces per kilo. Use of #5.5 nets yields 7-8 pieces per kilo. Use of both could yield an average of around 7 pieces per kilo. As the number gets higher, the smaller the mesh hole, and the smaller the size of fish caught.

Reminder: To be on the safe side, just avoid making gill nets with a mesh size of less than 3 cm (between two opposite knots of a mesh). By law (R.A. 8550, Section 89), use of fine mesh nets is prohibited. The law applies to all fishing areas, including fishponds, public or private.

 
As a guide, a half drum full of tilapia (see last photo of this blog post), but without water, is expected to accommodate 75 to 80 kilos of tilapia catch. This is an important tip for pond owners and operators, who may decide to delegate the selling to his staff. He’d know for sure that the actual weight at the fish center would be very close to 75 to 80 kilos. Besides, the fish center would issue a receipt containing the details of weight in kilos, selling price per kilo, total sales and deductions.

To be sure though, it’s always best to get the actual weight before the catch is transported to the fish center. Make sure to have a large weighing scale in your farm. Besides, pond workers will not fill up the half drum to its brim, when hauling tilapia to the transport vehicle (usually a "garong"). They'll allow space for water and some empty space.

Reasons for Taking Out Tilapia
 

Why take out tilapia from the ponds?

a. To decongest the tilapia ponds. Remember that unlike bangus, tilapias can breed and multiply.

b. To generate working capital to cover the cost of harvesting as well as cost of tilapia feeds.

c. To reduce the number of competitor fish in a bangus grow-out pond, thus allowing more space for the bangus to grow, increasing the dissolved oxygen presence in the pond (preventing “tangok” or condition of dissolved oxygen-starved fish swimming at the pond surface), and improving the feeding efficiency of the bangus, the primary crop.

d. To take advantage of high tilapia prices during certain months and weeks.

How to Make a Gill Net ("Tabal")
 

1. Buy the following materials from Dagupan or Lingayen fish supplies stores:

a. Net (with a width measured as 100 mesh holes (“mata”)). This particular width is good for making 3 gillnets. Length is 100 meters.

  
A newly purchased tabal net, 100 meters, 100 holes

b. Lead sinkers – will need around a kilo per gill net.

c. Rubber floaters – will need around a hundred pieces per gill net.


Four pieces of lead sinkers, a piece of rubber floater

d. Cord to be attached on top and bottom of a gill net. Should be #4.
 

e. Thread – one spool, should be #1. The thread is used to attach each lead sinker and rubber floater to the cord and net.


A roll of cord and a spool of thread

Materials bought to make a gill net shown together (clockwise from top left) - net (white), roll of cord (green), spool of thread, 3 pieces of rubber floaters, 4 pieces of lead sinkers (left below)

2. You'll also need some basic tools - scissors, wooden spool, and plastic threading needle.

An improvised wooden (plywood) spool on which to roll up the cord
 
A plastic threading needle

3. Unpack the cord from its original wrapper then wind the entire length onto the plywood spool.

Transferring the entire cord length to the wooden spool
g
Entire cord rewound onto a wooden spool. This will make handling of the cord easier.

4. Unwind the net using a basin so it can be spread.

Unwinding the net

5. Cut the net into three pieces, each measuring 32 or 33 mesh holes each. You may cut the net on the ground, or decide to hang the entire net from end to end and cut a third of the net’s width at a time.

Note: Some gill net ("tabal") makers prefer to insert a top cord first before dividing the net into 3 (Step 6).
 

Cutting the net at the 33rd hole all the way across the length to make one gill net

A cut net which can be made into one gill net. Only the cords, floaters and sinkers need to be attached.

6. Insert the cord into the holes of the net at the top and bottom along the net’s entire length.
 

Inserting green cord into the blue shaded hole at top of net

Using the plastic threading needle to make job easier. The needle is inserted into the blue holes.

7. Attach another cord of same length on top of the inserted cord (top part). No need to insert.

8. Attach one rubber floater at a time at the top of the net (that is, between the two top cords). Use a plastic needle and thread to sew the floater in place.
 

Close up view of the first rubber floater (black) inserted between two top cords

9. Place the second floater 22 holes away. Using the plastic needle and thread, sew the second floater in place. Repeat until you cover the entire length of the net.
 

A second rubber floater (yellow)

5 floaters already sewn in place on top of the net in between the 2 top cords

10. Attach another cord of the same length as the inserted cord (at the bottom part).
 

Two cords at bottom of net being tied together at one end

11. Attach one lead sinker at a time at the bottom of the net (that is, between the two bottom cords). Use the plastic needle and thread to sew the sinker in place.
 

First lead sinker being attached at the bottom end of the net

First lead sinker being sewn in place using needle and thread


12. Place the second sinker on the fourth hole from end of the first sinker, that is, first and second sinkers are separated by 3 holes. Using the plastic needle and thread, sew the second sinker in place. Repeat until you've attached sinkers along the entire bottom length of the net. As rough guide, you'll need about a kilo of sinkers per gill net.


A second sinker being inserted after 3 holes

The second sinker being sewn in place

Note: Other tabal makers allow a slightly longer distance between sinkers, to make it less heavier. This also means using less number of lead sinkers per gill net.

Below is a completed gill net ready for use in taking out marketable-sized tilapia (photo to follow soon).


To test its effectiveness, we tried using our new gill net (size 5) and we got 10.5 kilos of tilapias (59 pieces, or around 5.6 pieces per kilo), after just an hour or two. Not bad at all for one tabal.

We also tried renting 8 more tabals (comes with two workers) and caught 650 pieces of tilapia. Under this arrangement, they get 20 to 25% of the net sales proceeds (as payment for the net rental, labor of two workers, and service to sell the catch at the fish center).


Two workers come with rental of gill net. See them checking out the nets

Tilapia caught using tabal nets (in a drum and tub) ready to be brought to the fish center on board a "garong".

For a complete list of Fish Pond Buddy blog posts on fish farm-related topics, please click the Index page.


Sunday, September 17, 2017

Video of Bangus (Milkfish) Feeding in a Grow-Out Pond


Video of Bangus (Milkfish) Feeding in a Grow-Out Pond
 

During the last 6 days (Monday to Saturday), I was on a visit to my bangus farm in Binmaley, Pangasinan. I was about to harvest the bangus in my grow-out ponds. They were about 13 weeks old and already grew up to marketable size.

We stocked them at the ponds last June 10, 2017 (size 17, 14, and some larger size 12). At that time, most of the fingerlings were sized #14 (width of a small finger). This is the first time I was able to grow them to marketable weight and size in so short a time! I knew, because we took out sample pieces and weighed them.

What happened! Well, it was most likely the new feeder devices that we recently installed for our grow-out ponds. Because of the feeders, the bangus gained body weight faster, and the competitor tilapias were sidelined during feeding time.


Bangus feeder device and bridge; another one farther down near the farm hut


But we had to postpone the harvest.

We learned that prices for bangus that week were depressed. Lots of bangus were out in the market. Mostly coming from the illegal fish pens in Dagupan which were being demolished by the city government.

We knew it will take a number of days (or perhaps weeks) before the supply situation settles down and prices go back to normal levels.

We’ll continue to feed our bangus. But next week, hopefully, we can harvest.

Meanwhile, while I was checking out our bangus, I had my mobile phone with me and decided to do a quick video, before I lose the chance to shoot them altogether.

You have to excuse the quality. This was my first video clip. No apps, no editing, no tripod, no external mic – just the mobile phone with the built in camera. Please excuse the wrong orientation (should have used landscape!). The audio track was done in a hurry, based on the content of a previous blog on this subject.

It’s good there was no ambient noise while I was shooting. Just the swirling sound of the bangus enjoying their lunch at the feeding area.

I promise to do a better one next time. So here we go.


For procedures on how to make the bangus feeder device and build the bamboo bridge, pls. click this.

For a complete list of Fish Pond Buddy blog posts, please click the Index page.


Friday, July 14, 2017

How to Make a Milkfish (Bangus) Feeder Device

How to Make a Milkfish (Bangus) Feeder Device

Background
 

This June, we began the latest cropping season for bangus growing (June 1, 2017 to May 31, 2018).

Last year's production was our best so far. But there's still room to improve especially in feeding our bangus and in dealing with tilapia in our bangus grow-out ponds.


From experience, we learned it’s quite hard to insulate bangus from competing tilapia in the same pond. After draining and sanitizing the pond (using tea seed powder)  what happens? Tilapia eggs manage to survive during pond draining, treatment and water transfer. Pond conditions allow them to grow from eggs to fry to fingerlings. They now swim alongside our bangus.

Expectedly, tilapia compete for feeds with our bangus – thus, undermining the growth, size and weight of our bangus, the primary crop.

Last year, we had a similar problem with tilapia mixing with bangus in our grow-out ponds. As a result, our average harvest size of bangus was below norm.

For a typical milkfish grower, the aim is to grow bangus in 3 to 4 months, at an average of around 4 pieces per kilo. For a Class A pond operator, the target is even more stringent – 3 pieces per kilo after 3 months or better.

Last year, we only managed to grow to 4.5, or 5, or 6 pieces average per kilo of bangus per harvest. As a small consolation, we also harvested and sold large quantities of tilapia, but at a much lower price compared to bangus.

To be clear, tilapia are not thrash fishes at all. They can still command fairly decent prices especially when grown to market size. But they are best grown in a separate pond and fed with suitable lower cost feeds.
 

Bangus Feeder Device

So what can be done if tilapia “invade” a bangus pond and become opportunistic feeders?
 

Our planned strategy this year - use bangus feeder devices.

How does a feeder device work? Commercial feeds are poured into a plastic jug (hanging upside down). A PVC pipe protrudes from the mouth of the jug all the way to the pond water level below. Between the jug opening and the pipe is a plastic bottle, which serves as valve. When the bangus nudges or bumps lightly against the pipe, the valve opens and feed kernels are allowed to drop into the water below.

Through the feeder device, the bangus are expected to gain an upper hand during feeding time. They flock to the feeding station and crowd around the feeder. And when they do, the tilapia are kept at bay, keeping a safe distance, lest they get bumped off and hustled out by the “big guys.”

For a video of a feeder device, click this.

 
This is in contrast to a non-feeder way of feeds application (that is, feeds are broadcast or thrown by hand into the water, spread by wind action, over a wide surface area). 

Last year's results showed that bangus and tilapia alike, had equal chances of feeding. Our expensive bangus feeds were also consumed by the many tilapia. Result: bangus in the ponds were undersized and undernourished.

This year, as corrective measure, we built four feeder devices, two in each grow-out pond, hopefully with good results


How to make one? See procedures below.

How to Make a Feeder Device
 

1. Prepare the following feeder parts:

· A used water dispenser plastic jug

· A piece of PVC water pipe

· An old wire hanger

· A used plastic mineral water bottle (small)

· A piece of metal flat bar

· A pair of metal nut and bolt

· GI wire

2. Have the following equipment ready:

· Welding machine (or you can go to a shop for service for a small fee)

· Power drill and metal bit

· Pliers

· Screw driver

· Knife

3. Prepare the metal bracket for the plastic jug as follows:

a. Cut the metal flat bar so that it’s three inches longer than the diameter of the base of the water jug.

b. Drill a hole on the stem of the bolt.

c. Drill a hole at the mid length of the flat bar.

d. Weld the nut to the flat bar so that the nut hole coincides with the hole on the flat bar.

e. Insert the bolt into the hole flat bar and through the welded nut.

f. Set aside the completed bracket.


A completed metal bracket made of a flat bar, with hole in middle, nut welded on one side and bolt inserted into nut (you can use a smaller gauge flat bar)

4. Get the old wire hanger and straighten it to produce a length of thick wire (thicker than the ordinary GI wire).


A piece of thick wire (such as from a straightened wire hanger)

5. Insert one end of the wire to the hole in the bolt attached to the metal bracket. Bend the wire in place, using pliers.


Inserting wire into bolt hole

Tightening wire in place

6. Using a knife, cut off the bottom of the plastic jug.


Bottom part of plastic jug cut off

7. Place the metal bracket on top of the inverted plastic water jug, with the attached wire going down. Insert the wire through the mouth (or spout) of the jug.

8. Cut the wire to correct length, allowing for space for the top half of water bottle (see Step 9 below).


Cutting wire to correct length after inserting wire into jug

9. Cut the plastic water bottle into half, retaining the top part and its cap.


Cutting plastic bottle crosswise into two, retaining the upper portion with the cap

10. Make a small hole in the middle of the plastic bottle cap.


Making a hole on the bottle cap

11. Insert the wire into the cap. Twist back the plastic bottle into the cap.

Cap inserted into wire

Bottle twisted back on into cap (wire inside)

12. Insert the plastic bottle tightly into the mouth of the jug (bottle serves as valve).


Bottle sitting snugly on the mouth of the jug (bottle serves as valve to close or open the jug spout)

13. Insert a piece of PVC pipe (1/2 inch diameter) into the wire from the bottom of the bottle up to the cap; mark spot on the PVC where a hole will be made.

PVC pipe inserted up to bottle cap then marked where hole on the pipe will be made

14. Make a hole on the pipe


PVC pipe with hole (into which the wire will be hooked)

15. Remove the bottle from the wire, remove the jug, then unfasten the wire from the bracket (to make the job of connecting the wire to the pipe easier).

16. Insert one end of the wire into the hole in the pipe.


Making a bend in the wire to prepare inserting into the pipe hole

Inserting wire into hole in PVC pipe

17. Insert back the bottle into the wire (through the hole in the cap).


inserting the wire back into the bottle through the cap

18. Reinsert back the jug into the wire, then reattach the wire to the metal bracket.


Reinserting the wire into jug through its mouth, then reconnecting wire to metal bracket

Note that the plastic bottle should be outside the jug, with the spout of the bottle snugly sitting (like a valve) on the mouth of the jug.

Note: Adjust the length of the wire, if necessary. If too long, cut the wire to correct size until the plastic bottle spout sits tightly on the mouth of the water jug. To make sure that no feeds will drop when "valve" is closed.


Completed bangus feeder (top half view)

Completed bangus feeder (bottom half view)

13. Test the feeder to see if the jug spout opens with a lateral movement of the PVC pipe. Note: To loosen the pipe and allow some gap between the plastic bottle and the jug, use hand to tighten or loosen (i.e., lower or raise) the bolt in the metal bracket.

When the pipe is hanging vertically with no movement, the water bottle (serving as a “valve”) seals the opening of the jug.

When the pipe is nudged from its vertical position and swings left or right, the “valve” opens (a small gap is created between the jug opening and the bottle valve) and feed morsels are released from the jug.


Constructing a Bamboo Bridge for the Feeder Device


A bangus feeder device is hung directly above the pond water. Locate the feeder device in an area deep enough for the schools of bangus to swim to. Thus, a bridge is needed for this purpose, from which to hang the feeder.
 

We use bamboo bridge for each feeder device. It consists of 4 parts: a handrail, bridge deck or floor, posts, and supporting braces.

See procedures below on how to build one.

1. Buy “calasan” bamboo and prepare the following bamboo bridge parts:

a. Posts – prepare 6 pieces, 9 feet long each as main structural support for the bridge.


Five posts (middle of photo) with sharpened end. Note: an existing old bamboo pole will be used as the sixth pole.

b. Handrail – prepare one piece, 16 feet, 4 inches long to serve as hand support.


A piece of "calasan" bamboo to be used as handrail for the bridge

c. Bridge deck (floor) – prepare 2 pieces, also 16 feet, 4 inches each to serve as walk way from the perimeter dike to the feeder device at the end of the bridge.


Two pieces of calasan bamboo to be used as bridge deck or floor

d. Short wooden joists - over which the bridge deck is built – prepare 3 pieces, 21 inches each.


Three pieces of wooden tree branch to be used as joists over which the bridge deck is built
 
e. Bamboo support poles - to hold the posts in place


f. Nylon rope - #8 (4 mm) 


Unused nylon cord for tying bamboo pieces together

2. Install the 6 posts for the bamboo bridge. Sharpen one end of each 9 foot-post. Bury the sharpened end into the pond bottom until about 4.5 feet remaining length is visible from water level. Install a pair of posts at the dike side, a pair at the middle, and a pair at the farthest end of the bridge.

In our case, we installed only 5 posts, making use of an existing bamboo post in the dike where the bridge is to be installed. 


See two posts at end of bridge, two posts at middle, two posts at dike side (bottom part of picture, of which one is an existing old pole)

3. Tie one wooden joist to each pair of posts using nylon rope (see 3 joists, above photo, one at end of bridge, one at middle, and a third one at dike side).

4. Lay two long poles across the joists (see above photo in Step 2). These poles serve as the bridge deck, or floor, or walkway from the dike to the farthest end of the bridge where the bangus feeder will be hung. Tie them to the joists using GI wire. 


Note: You can make the bridge deck wider and lay three (instead of two) long poles across the joists. But in our case, two poles would be good enough.


5. Install bamboo diagonal support to the posts for greater stability. The diagonal support at the end of the bridge connects the two end posts and is long enough to also support the handrail (see Step 6 and photo below)

6. Tie the handrail to the diagonal support at the end of the bridge, to the post at the center of the bridge, and to the tall post at the dike end of the bridge, using nylon rope (see photo below).

Completed bamboo bridge seen from side view

View of bridge from the dike, how it is anchored to the earth dike and to an existing old pole
7. Hang the bangus feeder device at the farthest end of the bamboo bridge. Make sure that the bottom end of the PVC pipe is immersed 6 inches from water surface. You may need to install additional bamboo supports to adjust the feeder height (see photo below).

Feeder device hanging from a bamboo bridge; see additional bamboo supports at the end to adjust the feeder device at the desired height

Two bangus feeder devices - one at the left, and the other farther down near the red roofed bamboo hut (top of photo).


8. Make sure that the jug opening is wide enough to allow dropping of feed pellets to the water below. Turn the adjustment bolt by hand to tighten or loosen the opening.

9. Train the bangus to use the feeder device first by tossing a handful of fry mash around the feeding area. The strong smell of the fry mash will attract the bangus. Also, do continuous banging of a stick against the bamboo bridge to get the bangus’ attention. The sensitive receptors in the bangus will be able to detect the slight vibrations created at the water surface. As the bangus start to approach, toss a handful of floating commercial feeds around the area so they can start feeding.

Note: Remember that prior to the use of the feeder device and use of commercial feeds, the bangus get their food from natural sources (tiny plant and animal organisms in the pond). They tend to be wary of human presence and initially stay away. But slowly, they get attracted to the feeds until they eventually swarm around the feeder device (see photos below and pls. click this to see the video clip). 


Bunch of bangus swarming around the feeder device suspended from a bamboo bridge in the feeding area

Bangus nudging the plastic pipe from side to side, with the feed pellets dropping to the water below (as seen from another angle)

For a complete list of Fish Pond Buddy blog posts on fish farm-related topics, please click the Index page.